Ways To Describe Facial Expressions In Writing
ways to describe facial expressions in writing
humans can obviously talk to communicate, but you have to remember that, naturally, we use our face to show expressions as well.
EYES
- widened in surprise/shock, filled with confusion/hurt
- narrowed into a glare
- filled with tears
- looking down at the ground defeatedly
- gleaming with mischief
- shining with hope/determination
- burning with hate
- emotionless stare
EYEBROWS
- raised in surprise
- furrowed in confusion/thought/worry
- one eyebrow perked to show attitude
NOSE
- scrunched in digust
- blushing with embarrassment
- lifted higher = more confidence/bigger ego
- aimed lower = less confident/weak
MOUTH
- in a pout = upset
- gaping with shock/confusion
- lips shaking from trying to hold back tears
- pursed in thought
- pulled into a smirk
- widened into a grin
PUTTING THEM TOGETHER
- Eyes wide and mouth gaping, they felt numb with shock.
- They felt their face begin to burn as they shifted their gaze to the ground.
- They pursed their lips as they concentrated, brow furrowing.
- Their eyes gleamed with mischief as they smirked.
using facial expressions is very useful in writing. simply using dialogue to express your characters’ emotions and thoughts will lose your audience’s attention and interest.
keep these in mind while writing!
More Posts from Lrs35 and Others


Caddo Lake, Texas by Fred R Cox
some fucking resources for all ur writing fuckin needs
* body language masterlist
* a translator that doesn’t eat ass like google translate does
* a reverse dictionary for when ur brain freezes
* 550 words to say instead of fuckin said
* 638 character traits for when ur brain freezes again
* some more body language help
(hope this helps some ppl)
*through gritted teeth* you are not a child taking a test with the purpose of getting the highest score, you are an adult trying new things and finding ways to enjoy your life, make mistakes, be a beginner, be mediocre, be where you need to be, be unlikeable, just. be.
i cannot get mad at myself for not being good at answering texts and dms n emails n returning phone calls when i know in my heart that human beings were never meant to receive this much correspondence. even half as much would make you a busy person. like its ridiculous what we’re all doing to each other. smash your phones

ways to help protestors if you are unable to protest
everybody has to do their part. as a reference, this was posted on 1 june 2020. if any links are broken or direct to a place they should not, please feel free to add on with corrections. if there is new information with better knowledge, please feel free to share. thank you.
1. donate
do not donate to shaun king. he has repeatedly collected money to “support” black people, but no one knows where the money is.
BAIL FUNDS (ALPHABETICAL ORDER; NOT A COMPREHENSIVE LIST)
note: washington dc and new jersey have cashless bail systems.
bail fund google doc (also includes lawyers for protestors)
national bail fund network (directory of community bail funds)
community bail funds masterpost by @keplercryptids
resistance funds (google sheets; lists bail funds around the country)
nationwide bail funds (split a donation to the bail funds listed on the linked page with a single transaction)
atlanta bail fund
brooklyn bail fund
colorado freedom fund
columbus freedom fund
houston chapter of black lives matter
liberty fund (nyc based; focuses services on people from low-income communities)
los angeles freedom fund
louisville community fund
massachusetts bail fund
minnesota freedom fund (as of may 30, 2020, they are encouraging people to donate elsewhere since they have raised enough money; as of may 29, 2020, they do not have a venmo, as some fraudulent accounts have been claiming, source)
philadelphia bail out fund
richmond bail fund
MORE PLACES TO DONATE
note: more links are listed in the masterposts below.
northstar health collective (healthcare and medical aid for people on the front lines)
reclaim the block (aims to redistribute police funding to help the minneapolis community)
twin cities dsa (provides fresh groceries and hot meals to people in minneapolis)
2. educate yourself
it isn’t enough to sign petitions and reblog/retweet/etc. nonblack people, including people of color, owe it to black people to educate themselves and correct themselves and the people around them on anti-blackness.
note: more links are in the masterposts linked below.
resources and tools regarding racism and anti-blackness (google sheets compilation)
readings on society, racism, the prison system, etc. (twitter thread)
“where do we go after ferguson?” by michael eric dyson
official black lives matter website
3. give out supplies to protestors
people need supplies to protest safely, and even if they bring supplies with them, they can often run out. if you’re able, stock up and hand them out to people protesting. for more supplies to donate, see the “george floyd action” google docs link in section 5.
water bottles (dehydration and heatstroke are not things people should have to deal with alongside bastard cops. if the police in your area are particularly violent or known to use tear gas, get the ones with the sports cap/suction-thing/etc so people can use them as emergency eye-flushes.)
snacks (make sure to take into account that people have allergies of all sorts. foods will have a little label that says “may contain” and then list any potential allergens. write the allergens on the ziploc (or any container you use) in permanent marker, or better yet, write the snacks included in the pack.)
masks (don’t forget there’s still a pandemic going on. also it will aid in deterring facial recognition when the police try to track down protestors, also part two, if the cops use tear gas, wearing a mask (with the combination of a scarf or bandana) will lessen the adverse effects. lessen, not stop.)
bandanas, scarves, etc. and goggles (ski goggles, swimming goggles, etc.) (see above for explanation on the scarves. same goes for the goggles. anti–tear gas and anti–facial recognition.)
clean shirts (for people who are heavily gassed. also helps deter recognition through clothing.)
wound care supplies (band-aids, packets of neosporin packets or a similar antibiotic, alcohol wipes, etc.; if you can, decant bactine into those little travel bottles.)
a sharpie or another type of marker (for writing bail numbers or emergency contacts on arms, hands, etc. it’s not enough to have your city’s bail fund number stored on your phone; the police won’t give it to you to look it up. give people a marker so they can write it down, preferably not washable so it isn’t easily removed.)
IMPORTANT: KNOWING FIRST AID
tear gas: if you’re hit, get out as fast and as soon as you can. take anyone you can with you. the longer you’re in the gas, the harder it will be for you to see, and it can irritate your airways, making it hard to breathe. if you’re hit, don’t run; it’ll only make things worse on your lungs. when you leave the area, take a cold shower. don’t use hot water (it will only reactivate the agent); don’t bathe (it will only spread the CS around). (source 1) (source 2) (cdc fact sheet on tear gas)
move them to a clean and ventilated area where it’s as safe as possible.
ask them if they’re wearing contact lenses. have them remove it. if they’re wearing glasses, rinse it with water.
solution of half liquid antacid, half water. spray from the inside going out, with the head tilted back and slightly towards the side being rinsed. if they say it’s okay, open the eye slightly while doing this. (source)
bullet wounds: the most important thing is to stop the bleeding. be sure to check for an exit wound and cover that as well. treat both wounds, but treat the worse one first.
stop the bleed (youtube video by uc san diego health)
first aid in active shooting scenarios
making a tourniquet (a commercial tourniquet is best, but improvised ones can work as well if done properly; the most important things to remember is that tourniquets are for limb injuries and are not meant for the head or torso and that they have to be very tightly wound on the injury.)
how to apply pressure dressings
miscellaneous
adult cpr tutorial (youtube video by cincinnati children’s; think of “staying alive” by the beegees or “uptown funk”)
4. be a source of information
be responsible with this. people’s lives are at stake. that being said, the media is a fucking joke and the best way to get accurate information in a grassroots rebellion is amongst ourselves. record everything, but if you are going to share any information at all, be sure to blur people’s faces.
signal (encrypted messenger app; messages delete after x amount of time): app store | google play
tool for scrubbing metadata from images and selectively blurring identifiable features
tech tips to protect yourself while protesting (by rey.nbows on tiktok, via vicent_efl on twitter)
cop spotting 101 (google docs)
know your rights (by personachuu on twitter)
NUMBERS TO CALL FOR ARRESTED PROTESTORS (ALPHABETICAL ORDER; SOURCES LINKED TO THE NUMBER)
remember to keep phones OFF unless absolutely necessary. cell phone towers, stingrays, location notifs can all be used to track you and other protestors. don’t fuck around. if your phone must be on, keep it on airplane mode as often as possible and only communicate using encrypted methods. no, snapchat doesn’t count. (a twitter thread on stingrays, for those interested)
lawyers assisting protestors pro-bono (by riyakatariax on twitter)
atlanta: 404-689-1519
chicago: 773-309-1198
minneapolis: 612-444-2654
5. miscellaneous links and links for protestors
masterpost of petitions to sign, numbers to call, places to donate, and more (carrd by dehyedration on twitter)
#blacklivesmatter (google docs by ambivaIcnt on twitter; includes information on relevant events, other masterposts, lists of petitions and donation links, how to protest safely and protests to go to, and more)
george floyd action (google docs; includes information on apps to download, supplies to buy and donate, places to donate to, protest safety, resources on unlearning racial bias, and more)
how to get out of ziptie “handcuffs” (by finnianj on tiktok, via katzerax on twitter)
how can i help? by @abbiheartstaylor
how to make a signal-blocking cell phone pouch
tips for protestors by @aurora00boredealis
twitter thread for protestors (by vantaemuseum on twitter)
also, if you’re protesting, change your passcode. make it at least 11 characters long and don’t use facial/thumb recognition.
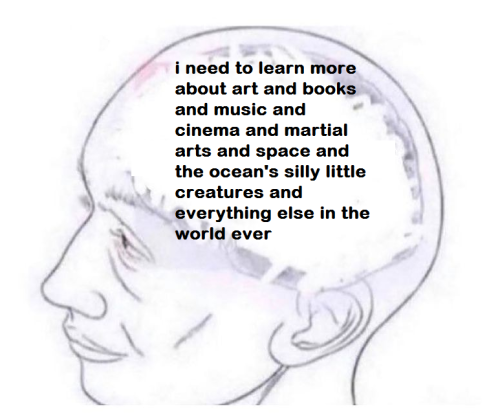
there’s so many things I want to do! unfortunately there’s also little determination from my part and images to look at instead
hi, a lot of you need a perspective reset
the average human lifespan globally is 70+ years
taking the threshold of adulthood as 18, you are likely to spend at least 52 years as a fully grown adult
at the age of 30 you have lived less than one quarter of your adult life (12/52 years)
'middle age' is typically considered to be between 45-65
it is extremely common to switch careers, start new relationships, emigrate, go to college for the first or second time, or make other life-changing decisions in middle age
it's wild that I even have to spell it out, but older adults (60+) still have social lives and hobbies and interests.
you can still date when you get old. you can still fuck. you can still learn new skills, be fashionable, be competitive. you can still gossip, you can still travel, you can still read. you can still transition. you can still come out.
young doesn't mean peaked. you're inexperienced in your 20s! you're still learning and practicing! you're developing social skills and muscle memory that will last decades!
there are a million things to do in the world, and they don't vanish overnight because an imaginary number gets too big
ANATOMY STUDY GUIDE 101

So studying anatomy is nothing like any other topic, especially when you study it at uni level, where they expect you to know every single small component of the body! So this guide is going to be concerning the musculoskeletal system and the nerves (PNS) and arteries in the body.
I have mentioned some of these tips before but I will put them in here aswell and so this can work as sort of masterpost. This is like a more “overall” type of masterpost. So if you want to have topic specific posts for example for nerves and arteries then let me know.
1. Find a study partner. First and foremost anatomy is so much easier when you are two dealing with it. Me and my study partner used to do anatomy spots together and by doing it two people together you can discuss what it could possibly be. You get to hear their train of thoughts which sometimes can be better than yours. Also you will have someone to quiz you and correct you when you say something wrong.
2. Accept that it takes time. First step to learning anatomy is dedicating a lot of time. It is not easy, you are cramming so much information into your mind and for it to stay there you will have to go over the same topic again and again and again. And I know it is really frustrating and you are going to spent maybe 10 hours trying to figure out the muscles of the leg and then next week when you review it again it will feel like a whole new topic, but this is all a part of the proces, just keep revising again and again and again.
3. The Atlas is your best friend. Invest in a good atlas, they are a little expensive but they work wonders because first of all they give you an image of what you study. And usually the text book images are not enough. In an atlas you will have “isolated” images but you will also have images where relations are shown. HOWEVER if you dont want to buy an actual atlas then maybe buy Complete anatomy which is a computer program that I also reffered to in my “5 sites every med student should know about” post. Here you can play around with the structures, view it from different angles and add on to it with other nearby structures or remove structures.
4. Say it out loud. Pretty self explanatory.
5. Create an overview. Rather than focusing on the details try to focus on creating an overview. Anatomy is already so difficult so dont complicate things for yourself. And if you know the basics then learning the details will be so much easier.
6. Use a whiteboard. Speaking of creating an overview, try using a white board for this. It is such a good way for creating an overview. I think because deleting and writing is so easy it kinda makes it less stressful than writing in a note book where ofcourse you worry about the aesthetic. Also try to do this with your study partner. You can plan on studying a topic together so lets say for example the muscles of the leg, you both at home study it, try to memorize it, look at it in an atlas and then you two meet. Now when you meet you get infront of a white board and start talking and writing about what you guys think is important and when you guys cant go any further then grab your notes and then add more on to the board.
7. MAKE IT VISUAL!. This is the most important step! Use bones, pay attention in your dissection classes, if you have the upportunity to touch, feel and look at structures then DO IT! This is the best way to learn. Spot as often as you can.
8. Make up rules. you can find a lot of them online, or just make some up yourself, me and my study partner did, for example the muscles M. erector spinae: I (m. iliocostalis) Like (m. longissimus) Standing (m. spinalis). If you turn it into a “game” then remembering it will be much easier.
And most importantly dont stress your mind that much. Allow yourself to take breaks, because over feeding your mind with knowledge in a short period of time can also be very damaging since you will waste time and not remember most of what you studied.
Good luck, stay motivated and stay dedicated
Love
Dunia
-
 everybodygoestothezoo liked this · 2 months ago
 -
 roselyn-writing reblogged this · 4 months ago
 -
roselyn-writing liked this · 4 months ago
-
 cookiesjar95 reblogged this · 9 months ago
 -
 real-ink-demon reblogged this · 11 months ago
 -
 lesgranules liked this · 1 year ago
 -
 dolourstories liked this · 1 year ago
 -
 wordcave reblogged this · 1 year ago
 -
 nanaaaaas liked this · 1 year ago
 -
 heckcareoxytwit liked this · 1 year ago
 -
 wheatleyinabox reblogged this · 1 year ago
 -
wheatleyinabox liked this · 1 year ago
-
 antennaeofjustice liked this · 1 year ago
 -
 ari-doodles-stuff liked this · 1 year ago
 -
 ahkmenra-sleftearlobe liked this · 1 year ago
 -
 julesdavis liked this · 1 year ago
 -
 newdawnhorizon reblogged this · 2 years ago
 -
 ali-laufeyson reblogged this · 2 years ago
 -
ali-laufeyson liked this · 2 years ago
-
 tbradshaw liked this · 2 years ago
 -
 yenoodlethings liked this · 2 years ago
 -
 raynethescribe reblogged this · 2 years ago
 -
 moviequotes23 liked this · 2 years ago
 -
 httptoru liked this · 3 years ago
 -
 cyraniadebergerac reblogged this · 3 years ago
 -
 writingrescourses reblogged this · 3 years ago
 -
 cloud-9x liked this · 3 years ago
 -
 alien6 reblogged this · 3 years ago
 -
 wordwordsy reblogged this · 3 years ago
 -
 invirtues reblogged this · 3 years ago
 -
 missmonsters2 liked this · 3 years ago
 -
 naegachy-jalnaga liked this · 3 years ago
 -
 lmaowhyyy333 liked this · 3 years ago
 -
 seonggi-huns liked this · 3 years ago
 -
 ruluru liked this · 3 years ago
 -
 wordybees reblogged this · 3 years ago
 -
 kristen1040 liked this · 4 years ago
