Latest Posts by oceangodz - Page 4
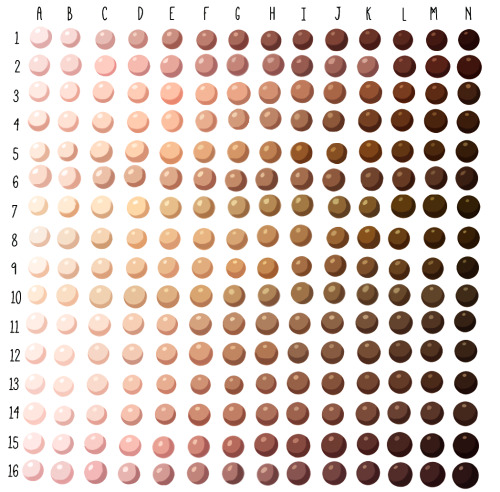
Skin tone swatches, for use as a resource.
Spudfuzz on Deviantart made the original resource, which I modified to be a bit more realistic. She gave me permission to post this.
☛These swatches, like all art resources, should be used as a “jumping off point!” All colours are relative, and change with lighting conditions. As they are now, these swatches work best for adoptables, character lineups, and other art where local colour is important. ☚
[DA]
Tiny Dangerous's Object Head Tutorial (With pictures!)
Hello all! I’ve gotten quite a few people askin how I went about putting together my head for a recent costume I did at Anime Iowa 2014, so I figured I’d make a tutorial for it! More under the cut!

Keep reading
How to Make an Object Head Cosplay
I finally got my Object Head cosplay tutorial up! The entire tutorial is under the cut along with the few pictures I took when I was making it. I hope it helps you guys!
Keep reading
pure and holy
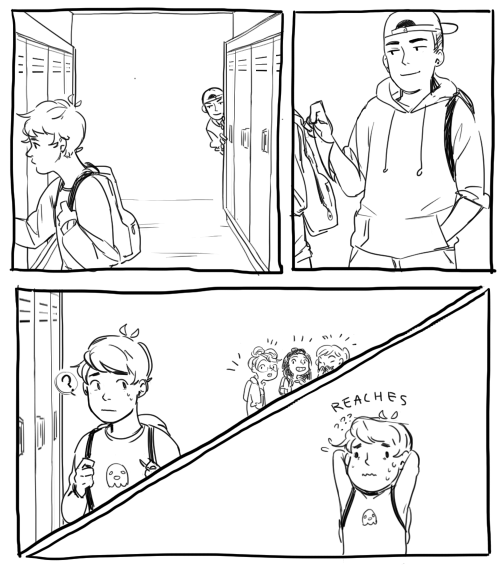
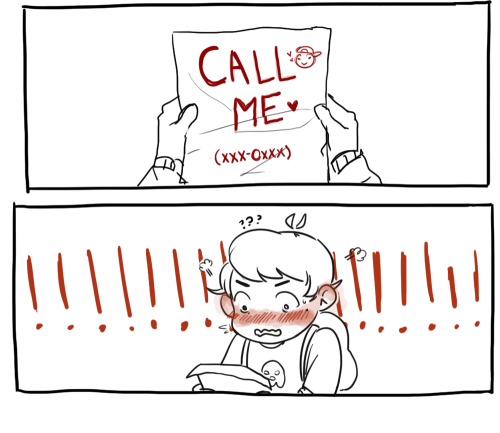

anyone please ask your crush out like this
To the anon that sent me four asks, sorry idk how to respond to all of them/ get all of them in one while on mobile rn. I’d recommend going through some of the self diagnosis stuff I’ve reblogged, there are quizzes and things. And for stims I’d recommend getting some stim toys or making some, fabric mazes, flour balloons, and bottle caps are all great stim toys that are pretty easy.
i’m asexual and tired. reblog if you are also asexual and tired.
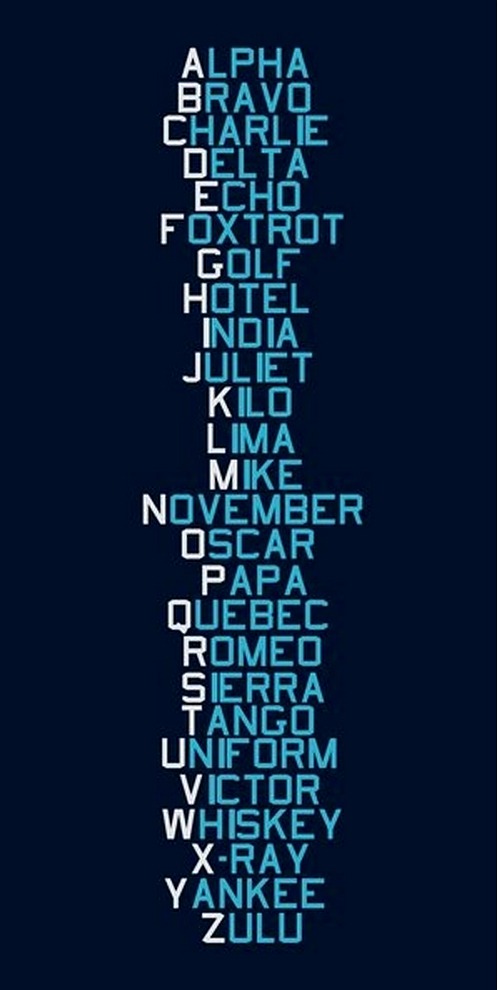
NATO Standard Phonetic Alphabet,
The phonetic alphabet was developed as a way to spell things out over radio communications that may be less then ideal, I.E. a lot of static or weak signal. All the words were chosen because they have a distinct sound that is easy to pick out. Military and police communications use the phonetic alphabet heavily and can be helpful to know for talking over CB’s or FRS (walky talky) radios.

♥♥♥
“I’m not mad just disappointed”, “Honey can you clean your room?”, and my favorite “You’re adopted and your step-father and I are getting a divorce”
Oh u love ur mom? Name 3 of her albums
I have not committed any crime!
Dear friends of Tumblr,
Today at my school we had an assembly about internet predators and when I had said that most of my true friends are over the internet and they gave me a lecture about how “I don’t know who I’m talking to” blah blah. So please, if you aren’t a predator in any way, please reblog so i can prove a point.
http://cosplayforall.tumblr.com/post/82642772514/texanona-i-was-telling-people-id-link-them-to
I was telling people I’d link them to a lot of cosplay help things over the weekend, but I forgot who for what and everything. So I’m just going to make a big post with all of the tutorials that I reference a lot/just think are very informative in general.
TRIM/HEM STUFF
Putting on Bias Tape
Cornering Bias Tape
Seamless Trim
Ruffles with Horsehair
Frills
DESIGNS ON FABRIC
Stenciling
Applique
More applique
Multi-color panels
Even more applique
GENERAL COSTUME STUFF
Centered zippers
Easy stretchy gloves
Torn edges on fabric
Patterning sleeves
Easy thigh high boots
Easy binder
Circle skirts
PROPS/ARMOR
Model Magic armor
Craft foam armor
Casting resin jewels
Flexible jewelry (it me)
Foam board weapons
More craft foam armor
WIGS
Keeping heavy wigs from slipping off
Curling
Spiking
Detangling Wigs
More detangling
How to wear a wig cap
Washing
helpful for 2017:
how to start the new year
2017 bullet journal set up
plan w me: january 2017
how 2 create a study space
time management tips
how to get motivated
get and stay organized
how to stop procrastinating

Some magical associations for the flowers of @eartheasy’s “Save the Bees by Planting These” post:
Lavender - love, attraction, healing, protection. Thyme - awareness, purification, cleansing. Cilantro - awareness, creativity, communication, success. Borage - luck, power, inspiration, increase psychic abilities. Sage - purification, exorcism, cleansing, healing. Fennel - communication, prosperity, fertility. Crocus - love, visions. Geranium - self confidence, soothes a broken heart. Aster - love. Poppy - glamours. Sunflower - happiness, healing, longevity, prosperity, love. Heliotrope - love (especially homosexual), invisibility, revelations.
Your garden will not only be a haven for bees but you’ll always have access to ingredients to power your magic.

https://instagram.com/p/BJBLESjBzjj/


Patterns, refs, and more+
So this con season I made myself Pidge and a Shiro paladin costumes to wear, with pretty good results. The worst part of it though was the amount of time I spent drafting patterns, so I figured this might be a good resource for anyone else looking to make armor in the future.
This is all based on my measurements (a 5′1″ average-ish build with… bigger thighs), so you’ll likely need to make adjustments to have this fit yourself, but hopefully this makes building your own cosplay a little easier. Materials, patterns and everything under the cut. Hope it helps!
Keep reading
a VOLTRON Paladin torso armor pattern
Hey dudes~ so someone asked if i was willing to share my armor patterns, and the answer is HELL YEAH.
So, here’s the dealio with these:
1. I used a dress form sized to me to make these.
( that’s 5″5, ~150lbs, 39-40″ at the bust lv,32″ at the waist.and 16″ across the shoulders.)
they can resize, but that’s on you. ;D
know your measurements, know where things line up.
2. These are designed with EVA foam as the intended material. Stuffed fabric could also work. (maybe.)
3. I’m all for sharing creativity, but for frack or quiznak sake, don’t repost and say you made these. don’t remove the text. its irritating and ugly fine, but the notes on the armor are important.
(it will confuse people and hurt my feelings okay? let’s be a cool fandom everyone.)
Let’s start!

I recommend using a ruler. since this is on pattern paper (a godsend, btw) the distance between the little blue marks is all a perfect square inch.
the EASIEST way to achieve symmetry is to do one half and fold and copy it to the other.
*I haven’t done the V shape yet, but can add it later or just make a proper tutorial thing.


Note: registration marks! also, this is designated as the LEFT shape, and connecting to the BACK piece of the armor. not the front. (flip it over and you got the right side!)
Now, I realized after cutting the foam and making sure i can get my head through the hole, this could get interesting really quick when getting the chest piece on and off, especially since my suit zips up the back…
SOLUTION: DO. NOT. GLUE. THE. BACK. PIECE. TO THE SIDES.
(or do, if you can fit. I can’t. broad shoulders.)
instead,on the back, I’m going to glue/staple/glue some black stretch fabric, and shape the gap to fit at an angle. it should sit flat when in place, and stretch when you need it to.
that way, you can get it on and off easily.
**I will update on how this goes.

this is where folding the pattern for symmetry is REALLY handy.
and a good example of how great this paper is.
the length of my guard is 20 inches.it lines up with the marks on the torso pieces.
the line going across as labeled is the light level. (EL tape goes there! diffuse your LED’s guys! be careful of your circuits!)
I still need to figure out the shoulder pieces, but this is what i got so far!
ALSO:
for anyone new to EVA foam:
https://www.youtube.com/user/evilted40/featured
Evil Ted Smith’s youtube channel is a friggn gold mine, guys.
if you do use EVA, please be careful. its difficult to cut, foam gives off fumes when heated or burned, and knives are sharp and most dangerous when slightly dull. use a dremel to fix an edge, not a knife. (it wont work.)
I’d also be happy to make a tutorial for using a dress form for this kind of thing!
feel free to message me personally if you have any questions, happy and safe cosplaying~!!
Voltron Helmet Tutorial
So I got asked how I made my helmet, so I decided to make an actual separate tutorial instead of just a few progress shots!
Materials:
EVA Foam
Packing or Painter’s Tape
Tin Foil
Cardstock (optional)
Okay, so first, I took a huge sheet of tinfoil and covered my head, leaving my face out:

then I covered the foil with tape, again leaving my face clear:

I then drew the basic pattern shapes onto the tape:

(again for clarity)

After, I CAREFULLY slipped it off, and cut along the lines. I cut a slit near the top of the side piece so I would know where to dart it on the foam:

I traced these onto cardstock to smooth and even the cuts I made:

I used these the trace onto my EVA, and cut those out. I made sure to cut the edges that meet along a diagonal after I cut the pieces out so that it would bend without showing the seam:

after that I just used hot glue to attach everything together, added superglue along the seams, sanded once dry, and cut the detail piece out of thin craft foam from the pattern i already made:

Paint it to your liking, et voilà!!

Paladin Suit Tutorial
Keep reading
Farewell online privacy
Dear friends of Tumblr,
Today at my school we had an assembly about internet predators and when I had said that most of my true friends are over the internet and they gave me a lecture about how “I don’t know who I’m talking to” blah blah. So please, if you aren’t a predator in any way, please reblog so i can prove a point.

Motivational* Slenderverse Quotes
If I’m totally honest, 2016 has been a thoroughly execrable year for reasons that, to quote Noah Maxwell, “ranged from dispiriting to insipid to insidious” -both personally for many of us, myself included, and generally for the world at large. So it’s at times like these where the stories most resonant to me are the ones whose rare glimmers of hope will acknowledge that things aren’t okay, or even motivate out of spite alone, but persist nonetheless… anyways, I hope the quotes under the cut help you out a bit like they helped me.
Keep reading
A Crash Course in Warding
Let’s just start a series of crash courses in witchcraft, since sometimes we need to learn things the quick and dirty way. Today, let’s talk about wards.
What are wards? Wards are protective energy barriers. They keep things out. You can place them around your home, certain rooms, even on certain objects. With practice and clear intentions, you can focus the wards to block out everything or only certain things. We’ll get to that in a bit.
Why should I ward my space and my things? Wards can keep out all sorts of things you don’t want in your home. They can block out negative entities, wayward spirits, mischievous entities, demons, and (if you’re really good at what you’re doing) even gods. Some people ward their divination tools so they know there are no spirits tampering with the results.
So what do I need to do first? Cleanse. This is very important. Wards are kind of like walls, or perhaps more accurately, bubbles. If you don’t clean the space first, you might trap things inside your ward bubble. You do not want that. There are lots of methods of cleansing, from burning sage to spritzing oil-infused water. Find a method you’re comfortable with and cleanse everything you’re going to be warding.
I’ve cleansed my home/item. Now what? Now we ward. I’m going to give you a couple methods. Let’s start with my favorite, incense warding.
Incense warding can also be done with spritzes of water/essential oil blends or herb-infused water if you can’t have smoke in your space. Whichever you’re using, you want to have a blend of protective herbs. Bay leaves, cinnamon, ginger, mustard seed, and salt are some great options that you can find in the grocery store, no fancy witch shop necessary. If you’re using incense, make sure you’re using natural incense and not super cheap stuff that’s artificially scented. The magic is in the herbs, and you won’t get that from fake scents.
How to Incense/Spritz Ward an Item
Smoke or spray item.
Visualize the smoke or spray clinging to the item and wrapping around it like a tight blanket, protecting it from anything that would cause harm (or interference, etc.).
How to Incense/Spritz Ward Your Space
Pick a place to start. I always start at my altar, but it’s up to you. If you’re doing multiple floors, start either at the top or bottom floor.
Moving continuously to your right, smoke or spray along the walls and door frames. As you go, imagine a barrier being formed around the walls, ceiling, and floor, pushing outwards to fill the room. Visualize the smoke or spray forming the barrier to keep out anything that will do you harm. [If you have a hard time with visualization, you can simply focus on the intent of the smoke or spray keeping things out.]
Keep moving right, following the layout of your home, making sure you get all the closet spaces. You basically want to outline the entire area you’re protecting, whether it’s you’re room or your whole house.
For multiple floors, repeat on each level.
For big layouts where there are rooms in the middle, go around those rooms as well.
I like to reinforce the wards over outside doors, windows, and mirrors. These are all passages of sorts, and when I reach them, I use the incense to draw a pentagram in the air over them. This is entirely up to you.
You’re done when you’ve reached the point where you began.
So why do we go to the right? Is that important? Kind of. Going to the right is like going clockwise. It’s about making things and progression, where going to the left or counter-clockwise is about deconstruction or reversal. [I read this idea in a witchy book a long time ago and will try to find a source when I can. If you honestly don’t feel it makes a difference, do whatever you’re comfortable with.]
Can I place wards that keep out certain things but not others? Sure. When you’re going around your space/warding your item, your intent is what’s important. I like to ward out entities that mean harm - it’s nice and general and doesn’t keep the fae out. Some people might want certain spirits and not others. Have your intentions clear in your mind as you place your wards.
That’s neat and all, but what are some other ways to ward? Let’s list a few.
Symbol/Sigil Wards
Choose (or make) a symbol or sigil that has protective properties. I’ve done this with Pluto’s astrological symbol because I worship him and it’s my way of being like, “Hey, Pluto. Please protect me, kthanxbai.” Pentagrams are nice and basic witchy/pagan symbols if you like them.
Draw the symbol over doors and windows. You do not literally have to draw it. It can be in water, incense smoke, or just your finger against the surface if you want.
As you’re drawing, make sure you have your intentions in mind - that nothing harmful can pass through this door, that the windows remain closed against entities, etc.
Energy Bubbles (if you have control over your energy)
Pick an item - any item.
Get your warding intentions in mind.
Channel lots of energy into the item. Visualize it emanating from the item in a bubble to fill your space.
If you’ve got mad skillz, you can form the bubble to the walls and be super exact with where its barriers are.
Vocal Wards
If you like spoken (or thought) spells, come up with a small chant to protect your space.
You can repeat this chant as you focus on your item being protected or as you walk around your home, protecting every room.
This is really great to incorporate into basically any other form of warding and gives your magic an extra bit of oomph.
I’ve heard wards can “fade” over time. True or false? Wards are just energy. Like all energies, they can disperse and weaken over time, or if something particularly nasty puts effort into destroying them. Redo your wards every so often (I do mine every few months, but it’s up to you), and especially before spiritual interactions. I also like to do mine after I’ve had lots of company, to kind of clear out family’s lingering energies and reinforce what I don’t want in my house.
In general, the intent of your wards is the most important part. Know what you want to keep out. This concludes our crash course on warding. Now go forth and protect some stuff!
Crystals For Motivation
Topaz
Citrine
Carnelian
Ruby
Red tiger’s eye
Apatite
Calcite

this is the perfect grade of good luck
reblog in 5 seconds and all of your grades will inch ever closer to perfect
I’m in! :3
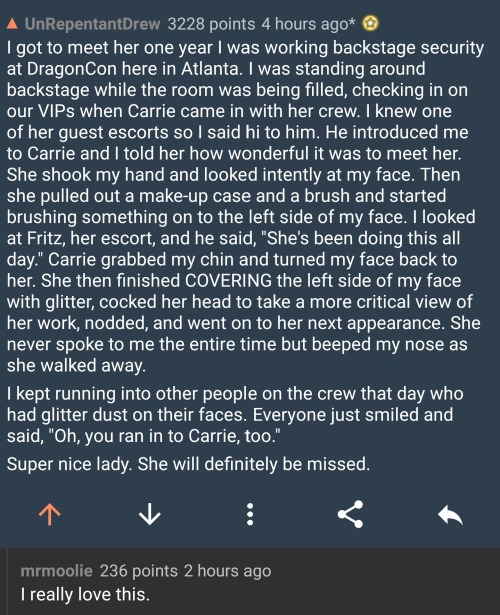
Carrie was an utter gift.
one word spells
As long as you can focus your energy and set your intention your spell should work, so I’ve designed these 5 spells using just one word for a Witch who needs a quick fix.
Mariquil
Pronounced mar-e-quil
Used to calm a temper or an upset person. From the latin word for sea, mare, and the english word tranquil. Essentially you are calling the sea inside them to be still. For better results cast with wet hands.
Univert
Pronounced Uni-var
Used for faster transport. I use it at the train station to have a shorter wait time but really its designed for traffic lights. By combining uni from universe and vert,the french word for green, you’re essentially asking the universe to make your path green.
Visididen
Pronounced Vis-e-did-en
Used to go unnoticed or invisible. Taken from the english words vision and hidden. For best results chant it softly while visualising yourself turning transparent.
Lapagna
Pronounced Lap-ag-na
Used when you just need someone to shut the f**k up but are too polite to say so. Taken from the Latin words lapis and magna, meaning stone and voice. For best results hold a stone or some earth while casting, if they’re really pissing you off just throw the stone or dirt at them.
Bavarignis
pronounced Bav-are-ig-ni
Used to strike up a conversation or to continue a conversation. Taken from the French word bavarder, which means chat, and the Latin word ignis, which means fire. Basically you’re asking for the conversation to spark or catch fire. For best results flick a lighter in your pocket or light a match.