Your gateway to endless inspiration
Recipe - Blog Posts
One Pot Meal

A zero-effort dinner with great flavour and fast cook time.
Simple and nutritious meals are an important thing to have in your back pocket, especially as a student. In a previous post, I shared The Ultimate Sausage Pasta, a quick and easy recipe from my housemate’s friend.
This time, we’re looking at the One Pot Meal, one of my favourite zero-effort dinners to make when I just really don’t feel like cooking. Minimal ingredients (two of which can sit in your cupboard until you need them) and an under half-hour cook time make this the perfect meal for when you’re tired or need a break from the kitchen.
As an added bonus, the Italian sausage adds great flavour on its own, so you don’t need to worry about whether you have the right spices or not!
Check out below for the recipe!
Prep: 5 mins Cook: 20 mins Overall: 25 mins

Ingredients:
1 pack (500 g) mild Italian sausage*
2 tbsp. (30 g) unsalted butter
2 cans sliced potatoes
2 cans cut green beans
* I prefer Johnsonville brand.

First, slice the sausages into ½ inch (1 cm) pieces.

Next, melt the butter in a large wok or high-rimmed skillet with a lid on medium heat.
Add the sausage and cook until cooked through, about 10 mins, stirring frequently.
NOTE: If you’re using the sausage from frozen, you’ll need at least an extra 5 mins to the cooking time.

Drain the canned beans and potatoes, discarding the liquid. Add them to the wok or skillet and stir in with the sausage.
Turn the heat to low and cover with the lid. Let cook until the potatoes and beans have warmed up, about 8 mins, stirring occasionally.
Once everything is heated up, divide and serve!
Overall, I give this a 5/5. It’s simple, tasty, and low effort - truly a fantastic meal for after a long day.
Pumpkin Shaped Dinner Rolls

"On Halloween night, the Great Pumpkin rises from his pumpkin patch and flies through the air with his bag of toys to [give to] all the children." - Linus, It’s The Great Pumpkin, Charlie Brown!
Happy Halloween everyone! I’ve been a huge fan of Charlie Brown for as long as I can remember. Every year, my family watches the specials on TV and I must have read each volume in my grandmother’s massive collection at least three times.
So, when I saw this tumblr post late last year, I knew exactly what I wanted to make for Halloween this year… but with a twist! After some trial and error, I’ve found a way to add cinnamon/pumpkin spice sugar to these rolls while avoiding a massive pocket of it.
So, grab your fall-themed drink of choice and check out below for how to make a batch of these delicious pull-apart dinner rolls for yourself! The great pumpkin may just pay you a visit for your troubles…
(Based on the post by Chef John from All Recipes and the tumblr post linked above.)
Prep: 20 mins Cook: 3 hrs Total: 3 hrs 20 mins

Ingredients:
1 cup (240 ml) milk, warm
1 packet (2 ½ tsp, 6.5 g) active dry yeast
1 tbsp. (15 ml) honey
4 tbsp. (57 g) butter, melted
1 tsp (6 g) salt
2 ¾ cup (345 g) all-purpose flour, plus ¼ cup (30 g) more for dusting
Kitchen string cut into 12 32-inch long pieces
Vegetable oil

Pour in the warm milk, yeast, honey, and butter into a large bowl and stir to combine (top-left).
Next, add the salt and the 2 ¾ cups of flour. Using a wooden spoon, stir in the flour until a shaggy, sticky dough forms (top-right).

Turn the sticky dough out onto a clean, lightly floured work surface and knead the dough until it becomes smooth, elastic, and is no longer sticky, about 10 minutes.
Form the dough into a rough ball shape by tucking in the sides. Lightly coat a medium or large bowl with vegetable oil and transfer the dough seam-side down (top-left).
Cover the bowl with lightly greased plastic wrap or a dish cloth and let rise until the dough has doubled in size, about 1 ½ hours (top-right).
Meanwhile, prepare two baking trays with parchment paper or reusable silicon liners.
TIP: I found that only about 3 tsp (8 g) of the reserved dusting flour spread out onto the board was needed to keep the dough workable without the buns becoming dense.
TIP: Remember from the video, you’ll know the dough has been kneaded enough when it springs back after being lightly pressed and you can stretch out a piece the dough like a windowpane without it ripping. The windowpane should also be able to support the weight of the rest of the piece of dough without ripping.

Once the dough has doubled in size, turn it out onto your clean work surface and knead it a few times to bring it back together.
Next, either cut the dough in half and divide each half into six even wedges or divide the dough into 50g - 55g portions using a kitchen scale.
Knead each portion a little and then pull in the edges of the dough to create a ball (like the big dough ball). Secure the its shape by placing the ball seam-side down on the work surface and gently rolling it with the palm of a clawed hand, for about 10 seconds.
Once the smaller dough balls have been formed, place them seam-side down on the prepared baking tray, cover, and let rest for 15 minutes.
Meanwhile, place the pieces of kitchen string in bowl and toss them with a generous amount of vegetable oil.
NOTE: Do not move onto the next step without this first rest. The dough will expand way too much around the string if you wrap it immediately.
Optional addition to this step:

If you’d would like slightly sweeter rolls to dip in coffee or tea, you can add some cinnamon/pumpkin spice sugar after kneading the measured portions and before shaping the rolls.
First, roll the dough flat and spread ~⅛ tsp. of the sugar mixture on one half (top left). Then, fold in half so the sugar mixture is covered and spread another ~⅛ tsp. on half of the folded dough (top right).
Fold in half again and follow the shaping instructions above to seal the rolls.
NOTE: If you put ¼ tsp. of the sugar mixture in the middle of the rolled dough and shape it from there, the mixture will not be evenly distributed throughout the dough - you’ll just get a dry sugar bomb in the middle of the roll.

After letting them rest, working one roll at a time, place the end of one piece of string on the seam-side of the roll with enough of an overhang to tie a double knot latter, ~2 inches (5 cm).
Wrap the string around the dough so eight sections are created. Unlike the tumblr video in the intro, I wrap the string around the dough in one motion (no crisscrossing or twisting strings).
The string should be secure but loose enough that it isn’t pressing much on the dough before the knot is tied.
Once wrapped, double knot the string so there is enough pressure to form small indents and return the roll to the baking tray knot-side down (which should also be seam-side down).
Cover and let rest for an additional 30 minutes. Preheat the oven to 375॰F (190॰C) with the oven rack in the middle of the oven.
TIP: Any adjustments to the placement of the string should be made before the knot is tied. The string is virtually unmovable at that point.
TIP: If you’re choosing to add the sugar mixture, set a 15 minute timer once you’ve shaped the first roll. Depending on how long it takes to get through all the dough, you may be able to start wrapping the string around the rolls as soon as you finish shaping the last one.

Sift a little bit of flour on top of each roll (top left).
Bake until the rolls have lightly browned and sound hollow when knocked, about 20 to 25 mins (top right).

Once the rolls have cooled enough to handle, cut the strings off of each roll from the bottom. Slowly and carefully unwrap each roll, removing any strands of string that get stuck.
NOTE: It might have been the string I was using, but I found a lot of little strands were left behind as I unwrapped the rolls. The best solution for this I found was:
Not to wring out any of the vegetable oil from the string when I took it from the bowl and,
Have my finger directly behind the string as it slowly peeled away from the roll to help all the little strands come off.
You’ll probably still need to go in an remove some from where the knot was tied, but this should get rid of most of them.

Finally, cut one or two cinnamon sticks into ¾ inch (2 cm) pieces and press one into the tops of each roll to create the stems.
TIP: To cut the cinnamon sticks, use a steak knife to make a small groove and then snap them at that mark. It’ll really save the durability of your knives. Use long sawing motions instead of short ones.
Voilà, your very own pumpkin dinner rolls! Overall, I would give these a 4.5/5 for the regular ones and a 4/5 for the sugar mixture ones - not because of the taste, but for the process.
Cutting the string, soaking them in oil, plus the wrapping, tying, and unwrapping nearly drove me insane each time. I would recommend making these, especially the sugar mixture ones, with a friend. The extra hands (and jokes) will go a long way.
In the end, although they were a little awkward to make, they were definitely a fun way to get into the spirit of the season (and flex on everyone /j)!
Bruschetta Grilled Cheese

You're welcome.
Welcome to the only recipe for grilled cheese ever.
Don’t like tomatoes? Doesn’t matter. Get lost in the sauce of basil, garlic, balsamic vinegar, and cheese.
I don’t remember who thought of this first, me or my housemate, so I'm giving us shared credit for this invention. All I know is that we were hungry, had bruschetta mix left over from the night before, and are both apparently geniuses.
Now, enough talking, onto the recipe.
Prep time: 15 mins Cook time: 15 mins* Overall: 30 mins
* Can be longer based on if you want to marinate the mix or how many you want to make.

Ingredients:
1 dry pint (312 g) grape or cherry tomatoes, diced
4-5 fresh basil leaves, chopped
4-5 large cloves garlic, finely chopped
4 tbsp. (60 ml) balsamic vinegar*
Salt and pepper, to taste
Sourdough bread, sliced into sandwich slices**
Butter
Mozzarella or Swiss cheese slices
* Can vary based on how much dipping sauce you need.
** I used Vienna style sourdough bread for aesthetics but any style works for this as long as it's the thickness of a sandwich slice.

Add the diced tomato, basil, and garlic to a medium-sized mixing bowl (top-left).
Then, add the balsamic vinegar and salt and pepper to taste (top-right).
NOTE: You’ll want to add more balsamic vinegar depending on how many sandwiches you’re making so that everyone has dipping sauce!

Mix everything together until all of the tomatoes have been coated in balsamic vinegar.
NOTE: You can totally eat this mix right away, but leaving it to marinate overnight gives extra depth to the flavour!

Heat a large, non-stick pan over medium heat. While it heats, butter two slices of the sourdough bread on one side.
Place one of the sourdough slices butter-side down in the pan once you can start to feel the heat radiating from the pan. Immediately add the cheese slices (top-left).
Add some of the bruschetta mixture on top of the cheese once you hear the butter start to sizzle (top-right). Make sure to leave as much liquid in the brushetta bowl as possible so it doesn’t make the bread too soggy!
NOTE: Definitely add the cheese before the mix. I’ve tried making this and adding the mix before the cheese and it just makes the bread soggy while you’re waiting for it to toast in the pan.

Add the top slice of bread butter-side out once you’ve added the bruschetta mix (top-left) and carefully flip the sandwich.
The structural integrity of these bad boys isn’t so great at this stage, so you’ll want to hold onto the top slice of bread until the last moment while you flip.
Repeat the flipping process until both sides are a nice golden brown (top-right).
TIP: To add some extra flavour to the bread, lightly drizzle both slices with some of the liquid from the bruschetta mix as they toast. Only do this once they’ve toasted for a bit on each side though or it’ll just make the bread soggy!

Now you’re ready to enjoy the best grilled cheese ever! Don’t forget the sauce!
As a side, I’ve found that carrots are a nice veggie snack to go with these since their sweetness compliments the sweetness from the tomatoes.
NOTE: I’ve found the bruschetta mix can be kept up to three days in a tupperware in the fridge before the flavour becomes just a little too overpowering.
Elven Marruth

“Sometimes reductively referred to as “root pies” by dwarves and humans, marruth are incredibly hearty closed-faced canapés that are filled with spiced and herbed mashes of vegetables (carrots, potatoes, and carrots) and then lightly baked in a flaky, buttery crust.” - Heroes’ Feast, p. 64
Eating seasonal foods is a popular option because it helps local growers, tastes fresher, and makes you feel more connected to the season. Now, this is all well and good if you live in a climate with longer or all-year growing seasons; but what can you expect to be growing when you’re knee-deep in snow?
Believe it or not, there are winter seasonal vegetables! (rip fruit, you’ll be missed until spring)
Elven Marruth from Heroes’ Feast is a great use of hardy winter-season produce. The small pastries make for a great snack alongside a warm bowl of soup or, thanks to their nutritious filling, a great meal on their own!
These small pastries also hold a special place in my heart for being the first recipe I ever made from Heroes’ Feast (alongside Underdark Lotus with Fire Lichen Spread on p. 93)!
Check out below for my process in creating the house and for some helpful tips and tricks when making this yourself! Get Heroes’ Feast here: https://dnd.wizards.com/heroes-feast
Prep: 15 mins + pie crust, if making Cook: 2h 30 mins
Total: 2h 45 mins

Ingredients:
1 small yellow onion, finely chopped*
1 small Yukon gold potato, peeled and cut into ½-inch pieces
2 carrots, peeled and finely chopped*
2 cups (300 g) packed finely chopped green cabbage*
3 tbsp. (44 ml) extra-virgin olive oil
Kosher salt and freshly ground black pepper
2 tsp. (3 g) finely chopped fresh thyme, plus 1 ½ tbsp. (4 g) picked whole thyme leaves**
¾ tsp. (4 ml) soy sauce
¼ cup (4 g) chopped fresh dill
All-purpose flour for dusting
Pastry for 2 double-crust pies, thawed if frozen
1 egg
* To cut down on prep time, roughly chop the onion, carrot, and cabbage and then process them together in a food processor. You’ll need about 15 pulses get them all finely chopped.
** To pick the whole thyme leaves, pinch a stem of thyme and run your fingers down the opposite way the leaves are pointing.

First, preheat the oven to 375℉ (190℃) with the racks in the upper-middle and lower-middle of the oven. Line two large rimmed baking sheets with parchment paper or nonstick (silicone) liners.
Then, in a bowl, combine the onion, potato, carrots, cabbage, and olive oil and toss to coat the vegetables with the oil (top-left). Add ½ tsp. salt and a few grinds of pepper and toss to distribute (top-right).

Transfer the mixture to one of the prepared baking sheets, spreading it into a thin, even layer (set the bowl aside) (top-left).
Roast the vegetables on either rack until tender, 25 to 30 minutes, stirring and turning the vegetables two or three times (top-right).
NOTE: I misread the instructions so I spread the mixture over both sheets.

Remove the baking sheet from the oven, add the chopped thyme, and stir to incorporate it. Spread out the mixture and allow to cool to room temperature for about 20 minutes.
Leave the oven on for more baking and return the cooled veggies to the now-empty bowl. Stir in the soy sauce, dill, ¾ tsp. salt, and pepper to taste. Adjust the seasoning as necessary, and set aside until needed.
If making the filling ahead of time, turn off the oven, transfer the cooled mixture to a tupperware, and put it in the fridge until needed.

Replace the parchment paper on the baking sheet or wash the non-stick liner and return it to the baking sheet. Have a small bowl of water handy.
Dust a large piece of parchment paper or a clean work surface with flour. Working with one ball of homemade pastry at a time, or one sheet of store-bought pastry, roll the dough into a 12-inch (30 cm) circle (top-left).
Sprinkle half of the whole thyme leaves evenly over the pastry, cover with a piece of parchment paper, and roll lightly to help the thyme stick (top-right).

Flip the pastry over so the thyme leaves are on the bottom, and set aside. Repeat with the remaining pastry and remaining whole thyme leaves.
With a 4-inch (10 cm) round biscuit or cookie cutter, cut at least six circles out of each pastry round.
TIP: To keep the pastry as chilled as possible for maximum ~flakiness~ while baking, work with and cut out circles from one ball of pastry at a time. Place each cut circle on a plate covered with cling film and put in the fridge until needed.
Keep the scraps from the first dough ball in the fridge and combine with the scraps from the second dough ball. Roll out the combined scraps for extra circles.
NOTE: My pie crust recipe gives quite a bit of dough, so you’ll end up cutting out way more than the six asked for by Heroes’ Feast.

Working with as many of the pastry circles as you feel comfortable with to keep the dough chilled, place 1 ½ tbsp. (one slightly rounded tbsp.) of the vegetable mixture in the center of each round, leaving a ½-inch border around the edge.
Working with one piece of pastry at a time, moisten the edge of the pastry circle and fold over the pastry over the filling to make a half-moon shape. Press out any trapped air, press the edges firmly to seal, and crimp the edges using a fork to secure the seal.
Transfer the crimped pastries to a separate plate and keep in the fridge until ready to cook.
Repeat with the remaining pastry rounds and filling.

Once all of the pastries are ready, transfer them onto the prepared baking sheets.
In a small bowl, beat the egg with 1 tbsp. water and brush the tops and sides of each marruth with the mixture (top-left).
Bake until the marruths are light golden brown and crisp, about 25 minutes, rotating the sheets 180 degrees and switching racks halfway through baking (top-right).
Set the baking sheets on wire racks, cool the pastries for about 5 minutes, and serve hot.
NOTE: Despite the recipe only being supposed to make 12, I’ve always gotten somewhere between 18-22 marruths from the filling.
NOTE: You’ll notice the BIG marruth I’ve made on the tray. I was trying to see if I could make a larger version of this recipe since I’d made smaller ones of the Hand Pies (p. 21). However, the consensus was that the smaller ones were better. Expect 4-5 more marruths than shown if not making the big one.

Overall, I would give this recipe a 5/5. I’m usually not a huge fan of vegetable-based dishes, but these veggie turnovers are awesome. I’ve made them for weekend lunches and many a movie night and they’re always a massive hit!
The vegetables really work together with the soy sauce and herbs to create a great flavour with a texture reminiscent of a spring roll. If you’re looking for a more savoury turnover, this one’s for you.
MAKE SURE TO EAT THEM WARM though. It might just be me, but they don’t really work if they’re any colder than room temperature.
I would also recommend making the filling and pie crust on one day and assembling them the next day. It makes the cooking time a lot less daunting and not eat up your free time :)
P.S. You can make these for someone who doesn’t like onion by leaving it out. I’ve made them like this before and they said they were great!
Heartlands Rose Apple and Blackberry Pie

“As the story goes, a hungry halfling returned from her hillside stroll with a heavy basket of crisp rose apples and plump blackberries. In typical indecisive halfling fashion, she couldn’t decide which to fill her pie with… so she chose both, and thus this legendary dessert was born.” - Heroes’ Feast, p. 139
As mentioned in a previous post, pie, the better version of cake, can take on many forms. With fall having wrapped up and given way to winter, it’s time to start scheduling Christmas parties and spending time with each other during the Holidays. So, why not dazzle partygoers by bringing in a slice (pun intended) of autumn with this apple and blackberry pie from Heroes’ Feast!
Although the original recipe is a little rough in construction, after some discussion for suggested changes, it holds together amazingly and makes sure that each bite, from the sweetness of the apples to the tartness of the blackberries, is worth the effort. This pie is also super great because it’s not overly sugary like most you’ll find at the store; using just enough while allowing the fruitiness of the filling to shine!
In this post, I’ll be breaking down the steps that were taken, for filling and crust, that help ensure that you end up with a stable pie instead of pie soup. In a rush? No worries, all changes are also summarized in the results section.
See below for my notes on the results and for some helpful tips and tricks when making this yourself! Get Heroes’ Feast here: https://dnd.wizards.com/heroes-feast
Prep: 15 mins* Cook: 5 hours** Overall: 5 hours 15 mins
* Can take longer if making your own crust.
** Can vary based on your experience making pie, this is the high-end estimate with plenty of leeway time. To save time on the day of, make the apples and pie crust a day ahead and store them in the fridge. If not possible, try to make the pie crust a day ahead and cook the apples while the crust chills in the fridge in the pie plate (see recipe steps).

Ingredients*:
⅔ cup + 1 tbsp. (155 g) sugar
½ tsp. (3 g) cinnamon
3 tbsp. + 2 tsp. (23 g + 5 g) cornstarch**
kosher salt
3 ½ pounds (1,575 g) [about 6] baking apples, peeled, quartered, cored, and cut lengthwise into ¼-inch slices***
Pastry for 2 double-crust pies
12 ounces (340 g) blackberries, rinsed
1 tbsp. (5 ml) fresh lemon juice
1 ½ tbsp. (21 g) unsalted butter, cut into pieces
1 egg
Lightly sweetened whipped cream for serving (optional)
* Makes one 9-inch deep-dish pie. Here’s the pie dish I use.
** Because there’s a lot of liquid in the filling, I took A Finnicky Guide’s suggestion and added a little more cornstarch. I split the extra 2 tsps. (5 g) between the apples and blackberries.
*** For pies, you need to be careful with the apples you select. When choosing your apples, especially for a liquidy pie, it’s important to consider the amount of pectin (a natural “glue”) present in the apple. For the reasons listed in the linked article, I chose Granny Smith apples instead of those listed in Heroes’ Feast.

The first change to make is with how the apple filling is prepared. Cooking the apples on the stove, instead of in the microwave, will allow the juices released from the apples to have a caramel-like consistency instead of staying super watery. I adapted the method from King Arthur.
First, in a large pot, whisk together 1⁄3 cup of the sugar, the cinnamon, 1 tbsp. + 1 tsp. cornstarch, and ¼ tsp. salt. Add the apples and gently mix to combine.
Turn the heat to medium-low and allow the apples to warm up, about 10 minutes, stirring occasionally. Then, allow them to cook for an additional 10 minutes, stirring occasionally (top-left picture).
You’ll know they’re done when you can bend the slices without them breaking (top-right).
TIP: To get the apples all to a uniform size, I recommend using an apple corer. Here’s the one I use.

The second change to construction is with the pie crust. In order to prevent the liquid in the pie from infusing with the uncooked dough and turning it mushy, we’re going to firm up the bottom crust by blind-baking (partially cooking) it before adding the filling. To blind-bake, I’ve condensed the method from Sally’s Baking Addiction.
On a floured work surface, roll out the pie dough into a 12-inch (~30 cm) circle. Transfer it to a deep-dish pie plate and fit it in gently by lifting the edges of the dough as you gently press it into the bottom and sides of the pie dish. Leave ~1-inch overhang around the rim and trim the extra (picture 1) ). Do not dock (prick holes in) the bottom crust yet. Set it in the fridge to chill for 30 mins. Preheat the oven to 375℉ (190℃).
Next, crinkle up a piece of parchment paper large enough to cover the pie dough. Place it in the baking dish and weigh it down using ceramic pie beads, dried lentils, or dried beans. I used pinto beans. This will allow the crust to cook without bubbling at the bottom or shrinking too much away from the edges (picture 2) ).
Place the pie plate onto a baking sheet and put it in the preheated oven to cook for 15-16 minutes. Take it out and carefully remove the parchment paper with the weights. Dock the bottom crust with a fork and return it to the preheated oven, without the weights, until the crust begins to turn a golden brown, another 7-8 minutes. Remove again from oven and set aside (picture 3) ). Preheat the oven again - this time to 425℉ (218℃).
TIP: You can reuse your blind-baked beans/lentils for future pies! So feel free to store them in their own labeled container for use at another time.

While the bottom crust chills, whisk together ⅓ cup of the sugar, the remaining cornstarch, and a pinch of salt in a medium-sized bowl.
Add the blackberries and gently toss to coat. Then, add the lemon juice and gently fold until the sugar mixture is moistened and syrupy.
Since the blackberries will release their juice as they break down, to reduce the liquid content, remove 1 tbsp. of the syrup and discard.

For attaching the top crust to the partially-baked bottom crust, I followed Food52’s method.
To assemble the pie, start by spreading the blackberry mixture evenly over the bottom crust and scatter the butter pieces overtop (picture 1) ).
Strain the apples through a colander, catching the liquid in a bowl, and spoon them on top of the blackberries. Pour half of the reserved apple syrup over the apples (picture 2) - I added the apple syrup, I just took the picture too soon rip)
On a floured work surface, roll out dough into a 12-inch (~30 cm) circle and place it over the apple mixture. To seal the edges, start by folding the top crust under the overhanging bottom crust as much as possible without breaking the bottom crust. Then, use a fork to crimp the top and bottom layers together (picture 3) ).
Beat the egg with 1 tbsp. water and brush it over the top of the pie crust - including the edges. Sprinkle the remaining 1 tbsp. sugar evenly over the top. Place the pie into the oven preheated to 425℉ (218℃) (picture 4) ).

Bake the pie at 425℉ (218℃) until the top is light golden brown, about 25 minutes. Then adjust the heat to 375℉ (190℃), rotate the baking sheet 180 degrees, and continue baking until the crust is golden brown 25 to 30 minutes.
NOTE: I found my crust turned golden brown after 25 mins at 425℉ (218℃). I still adjusted the heat to 375℉ (190℃) and let it cook for the remaining time. However, I kept an eye on it to make sure it didn’t burn (it didn’t).

Remove pie from oven and baking sheet and allow to cool to room temperature on a wire rack, about 2 hours.

From the pictures above, you can see how changing up the steps in the construction helped with the structural integrity of the pie:
Using extra cornstarch allowed both fillings to thicken more while cooking, helping to create a distinct layer for the blackberry mixture (top-right);
Using Granny Smith apples allowed for the extra pectin in the apples to thicken the liquid on the stove and keep additional juices trapped inside the slices as they baked in the oven (also keeping the apples from drying out in the oven);
Cooking the apples on the stove gave the apple syrup a more caramel-consistency instead of staying watery;
Not only did blind-baking the bottom crust keep the vast majority of the liquid inside the pie as it cooked (top-left), but having an extra-crispy bottom crust allowed any pie kept as leftovers to have a distinct bottom crust instead of it becoming soggy;
Removing a little bit of the syrup from the blackberry mixture allowed the blackberry syrup to become less soupy and thicken into its own distinct layer (top-right).

Tl;dr: to recap what improved the construction of the pie:
Use a little extra cornstarch. Not much, just an extra tsp. (3 g) per filling will do.
Choose the right apples for the job. You want to make sure the ones you choose have enough pectin to keep in most of their juices. Solution: use Granny Smith.
Cook the apples on the stovetop. Using the stovetop allows for the juices released from the apples to have a caramel consistency instead of staying watery.
Blind bake the bottom crust. To keep the liquids from infusing with the bottom crust, partially bake the bottom crust using the listed method.
Remove 1 tbsp. of liquid from the blackberries. They have plenty of liquids to start and will produce more when they start to break down.
Overall, I would give this pie a 5/5 after the modifications to construction. The sweetness from the apples and the tartness from the blackberries really work to bring this together in the best way.
As mentioned in the intro, I really appreciate the fact that there is very little sugar added. Not only does it let the filling stand out on it’s own, but it also makes the pie enjoyable to those who don’t have as much of a sweet tooth.
Dragon Salmon

“[...] the Aundair River is famous for the seafood that half-elven anglers bring back to the markets of Fairheaven. The traditional preparation of the enormous salmon that spawn in that river, like much else in Aundair, relies heavily on sauces: in this case a butter and dark wine reduction.” - Heroes’ Feast, p. 75
Packed full of healthy minerals, fats, and vitamins, fish is an important part of a healthy and balanced diet. However, the cost of fresh fish can reach astronomical prices in places where it isn't readily available. So, why not make the most of the fish you buy when splurging for it?
The Dragon Salmon from Heroes’ Feast is a great, easy recipe to get anyone started on pan-searing salmon while making it look like it came straight out of a Michelin star kitchen. With a flavour combo to die for, it’s sure to make the mouths water of even the pickiest seafood eaters!
BONUS: See the results section for suggestions on vegetables that will add a colourful flare while plating up!
See below for my notes on the results and for some helpful tips and tricks when making this yourself! Get Heroes’ Feast here: https://dnd.wizards.com/heroes-feast
Prep: 10 mins Cook: 25 mins Overall: 35 mins

Ingredients:
1 ½ pounds (1.5 kg) skin-on salmon fillet, pinbones removed if necessary, cut crosswise into 4 equal pieces, and blotted dry*
Kosher salt and freshly ground black pepper
2 tbsp. (30 ml) neutral-tasting oil (such as vegetable, canola, safflower, or grapeseed)
2 tbsp. (28 g) unsalted butter
1 shallot, finely chopped
1 tsp. (1 g) minced fresh thyme
⅔ cup (160 ml) fruity, medium-bodied red wine (such as Pinot Noir, Côtes du Rhône, or Zinfandel)**
½ cup (80 ml) low-sodium chicken broth
1 ½ tbsp. (5 g) minced fresh chives, for garnish
* I’m usually not a believer in organic foods. However, I found using organic salmon for this recipe really increased the flavour.
** Don’t use the cheapest wine for this recipe, you can really taste it. Instead, opt for a 14-16$ bottle. I recommend Bolla Valpolicella.
NOTE: Be careful if using dried thyme instead of fresh thyme since dried spices have a much more concentrated flavour. Use one-third of the amount of fresh thyme called for in the recipe if substituting for dried.

First, preheat the oven to 200℉ (93℃) with the oven rack in the middle of the oven.
Next, after blotting the fillets with paper towel, sprinkle them with salt and pepper and lightly massage it in.
TIP: Blotting both sides of the fish helps prevent it from sticking to the pan while it cooks.

Warm oil in a nonstick skillet over medium-high heat (I set mine closer to medium) until shimmering.
The general trick with pan-frying fish is to use high heat and to give the fillets enough time to cook on both sides while only flipping them once.
To achieve this, place the salmon fillets flesh-side (pink side) down and cook, undisturbed, until the bottoms of the fillet start to turn opaque (like a golden band around the bottom) and the sides of the fillet have lost their vibrant pink colour, 3 to 4 minutes.
Gently flip the fillets using either tongs or a spatula so they are now skin-side (silver side) down. Again, cook, undisturbed, for 3-4 minutes until the fillets have lost all translucent properties on the inside and the flesh flakes apart when checked with a fork.
NOTE: The timings for my fish really depended on their thickness. It sometimes took me 5 minutes a side to cook!
TIP: A downside of frying fish in a pan is that the oil will splatter as it cooks. To save yourself some clean up time (and your arms and hands), place splatter guards over the skillet to catch most of the flinging oil.
TIP: Pan-frying any kind of fish will cause your house/apartment to smell like fish. To help with this, open your windows before you begin cooking. If available, turn your fumehood on high.

Once the fillets have cooked, transfer them to a heatproof plate or baking tray lined with aluminum foil. Place the fillets in the oven to keep warm while the sauce cooks.
TIP: Like @afinickyguide found, the fillets tended to dry out if left in the oven too long. To keep them moist, tent a piece of aluminum foil over the fillets before putting them in.
TIP: Let this picture be a lesson in why you never want to overcrowd a pan. I couldn’t find the tongs and had to use a spatula to flip and get them out of the pan. Disaster!

Reserve the oil used for cooking in a separate bowl for later. Then, wipe out the skillet.
After, melt 1 tbsp. butter in the skillet over medium-low heat. Add the shallots, thyme, and ¼ tsp. salt and cook, stirring constantly, until the shallots soften - about 1 minute.

Heroes’ Feast says to add the wine and the chicken broth then adjust the heat to medium-high and bring the mixture to a simmer to cook until reduced by two-thirds. However, I’ve found that simmering the sauce on medium-high reduces it too quickly, and simmering on low (as simmering usually works) reduces it too slowly.
Instead, for more consistent results, add the wine and broth and simmer on medium for 6 minutes (for the sauce to reduce by two-thirds). Stir occasionally and scrape the bottom of the pan to loosen any stuck browned bits. Add the reserved oil halfway through.
TIP: Like @afinickyguide, I found there was barely enough sauce for all four fillets. I recommend doubling the amount of ingredients for the sauce to have enough.

Reduce heat to low and add the remaining 1 tbsp. butter, ¼ tsp. salt and pepper to taste. Stir constantly while the melts and incorporates into the sauce. Taste the sauce and, if necessary, adjust seasoning with salt.
Pour or spoon sauce over or around the salmon fillets, sprinkle with chives, and serve hot.
TIP: If you don’t like skins on the bottom of your fish, they can be easily taken off after cooking by turning the fillets on their sides before plating and gently prying them away using a fork while a spatula keeps the fillet in place.

Overall, I would give this recipe a 5/5. Fish is a staple in my house and I’m happy to say that this recipe has replaced our traditional one - it’s truly outstanding! The sauce is a perfect balance of flavours and choosing the right red wine provides excellent body and depth to the meal.
As mentioned earlier, I only have two gripes with this recipe: the fillets can dry out easily if left to warm in the oven too long and that you may need to make double the amount of sauce, depending on your tastes. However, both are easily fixed by tenting the fish with aluminum foil before placing it in the oven and doubling the amount of ingredients for the sauce.
BONUS: For extra flair when serving, plate the fillets with green veggies like broccoli, peas, or green beans for a colourful contrast!
Soul Cakes and Halloween Costumes

“Double, double toil and trouble; fire burn and cauldron bubble” - Witches’ Speech, Macbeth
End of October and early November is an interesting time of year. Marking the end of the harvest season, October 31st - November 2nd share four separate holidays:
Halloween on the 31st;
All-Saints Day on the 1st; and
All-Souls Day and Samhain on the 2nd.
For such an interesting time of year, it’s no wonder that recipes have appeared across time to commemorate each occasion.
Traditionally baked to celebrate All-Souls Day, Soul Cakes are sugar-cookie-esque spiced cookies (or biscuits) that are made with none of the vanilla extract, baking powder, or baking soda that we’re used to seeing in modern recipes. Rather, they rely on their interesting blend of spices to treat your taste buds!
If you’re looking for something to keep the Halloween season going at school or work even after the holiday has passed, bring in these cookies to snack on!
Have a safe and happy Halloween/ All-Saints Day/ All-Souls Day/ Samhain everyone!
P.S: The fox in the picture is named Elphaba!
(Adapted from Helen Best-Shaw’s Fuss Free Flavours and Cooking Journey Blog)
Prep: 10 mins Cook: 30 mins Overall: 40 mins

Ingredients*:
¼ cup + 3 tbsp. (100 g) unsalted butter, softened
½ cup (100 g) packed light brown sugar
2 egg yolks
2 cups (250 g) all-purpose flour
1 pinch saffron or ground turmeric (for colour)
1 tsp. (2 g) all-spice
½ tsp. mixed spice**
2 ½ tbs. (35 ml) milk
50 g raisins***
* Makes enough for 15-18 2-inch (5 cm) diameter cookies or 24-27 ~2.6-inch (6.6 cm) diameter cookies.
** Mixed spice is a spice blend that includes cinnamon, coriander seed, caraway, nutmeg, ginger, ground cloves, and caraway. I don’t have access to this blend so I added ¼ tsp. cinnamon, nutmeg, ginger, and cloves individually to make ½ tsp..
*** I didn’t have any regular raisins so I substituted for golden raisins.

To start, preheat the oven to 360℉ (180℃) and line a large baking sheet with parchment paper.
Next, in a large bowl, cream together the butter and sugar.

Then, whisk in the egg yolks.

Add flour, all-spice, mixed spice, and milk and stir until the dough holds together.

After, stir in the raisins until they are well distributed.

Turn out the dough onto a floured surface and roll it out to about o.6-inch (¼ cm) thickness. Then, cut the dough in circles using a cookie cutter.
Recombine and re-roll any dough scraps to get the most cookies possible!

Place the dough circles on the parchment-lined baking sheet - leaving space between each cookie. Cut a plus-sign (or cross) shape on each cookie (adding the raisin is optional).
Bake on the middle oven rack for 15-20 mins - rotating the pan halfway through - until they are golden brown. Let them cool on the baking sheet for a few minutes then transfer them to a wire rack to cool for 10 minutes before serving.

Overall, I would give this recipe a 5/5. The spices used in the cookies made for a different and delicious spin on the sugary cookies we’re used to nowadays. I had a lot of fun diving into this medieval British treat and hope to try more in the future!
Happy Halloween/All-Saints Day/ All-Souls Day/ Samhain!
Baked Feta Wrap

I’ll make a better pub night, with chicken and feta! - Me
Who doesn’t love a night with friends after a long week? Whether you’re meeting up with a large group or settling in with a few close friends, it’s always nice to take some time to unwind and catch up. You know what we all don’t love? Expensive prices at bars and pubs. So, why not bring the vibe of pub night home and save some cash!
Popularized on TikTok back in 2020, the original tomato-feta sauce took the app by storm and spawned a whole batch of variations. Although I can’t find it anymore, the most interesting, to me, was from a woman roasting her cheating SO while turning this tasty sauce into a wrap (disguising the elastic as olives? Oof).
So, as midterm season comes to a close (or reaches its penultimate), this recipe is sure to make some great, easy snackables to kick off either a study sesh or a night out. Or, make your friends jealous by bringing it with you to school for an eating-out-style lunch without having to spend the cash!
Cheating SOs dni.
VEGETARIAN? No problem! Check out the results section for how to make this recipe work for you!
(Adapted from Rachael Ray’s recipe and the TikTok mentioned in the intro)
Prep: 5 mins Cook: 1h 30 mins Overall: 1h 35 mins*
* Will take 1h 15 mins time if not allowing the sauce to fully cool.

Ingredients*:
½ cup (118 ml) olive oil
2 pints (550 g) cherry tomatoes
One 8-ounce (225 g) block feta
2 cloves garlic, finely chopped
¼ tsp. (0.5 g) red pepper flakes
4 large fresh basil leaves, chopped (or 1 handful of smaller ones)
Salt and pepper
1.5 pounds (750 g) chicken strips
1 box (142 g) baby spinach
24 medium (not mini) whole-wheat tortillas
* Makes enough for ~24 medium wraps (8-12 servings).

To start, preheat oven to 400℉ (204℃) and move the oven rack to the middle.
In a baking dish, toss the olive oil, whole cherry tomatoes, salt, and pepper until all tomatoes are coated (above-left).
Next, add the feta to the middle of the baking dish. On top of the feta, add a splash of olive oil and some pepper (above-right).
Place in the oven and bake for 30 minutes.
NOTE: I used 2 blocks of feta so I put olive oil and pepper on each block and stacked them.

While the tomatoes and feta bake, prepare the chicken.
To remove extra juices on the outside (and prevent the strips from sticking to the skillet) blot both sides of the chicken strips with a clean paper towel.
Then, sprinkle both sides with salt and pepper and lightly massage it in.

Next, heat 1 tbsp. olive oil in a non-stick skillet over medium heat until shimmering. Add chicken strips to the pan and allow to cook for 4-5 minutes a side until the inside is no longer pink and the internal temp reads 165℉ (74℃).
After cooking, remove skillet from heat and move the chicken to a plate to rest.

After 30 minutes in the oven, increase the heat to 450℉ (232℃) and bake for another 5-10 minutes or until the tomatoes and feta have browned.

Once everything has browned, remove the baking dish from the oven and add the chopped garlic and red pepper flakes. Break apart the feta block and stir so the residual heat cooks the garlic and incorporates the flavour from the red pepper flakes.
Unlike the pasta recipe, your goal here is to make sure everything is incorporated and has cooled down a little before assembling the wraps. It will take ~10 minutes to incorporate the sauce and then another ~20 minutes to cool. I recommend placing the baking dish on a wire rack to help it cool faster. If you’re in a rush, you can make the wraps with the warm sauce right after incorporating everything but it will be much harder to roll the wraps.
You’ll know the sauce is ready when you don’t see large streaks of olive oil while stirring or clinging to the sides of the baking dish.
NOTE: I recommend placing a kitchen towel or paper towel under the baking dish as you stir. I’ve made this several times now and always manage to stir a little too hard and spill some olive oil. Best to cut the spillage mess off at the pass.
TIP: Take the time when the sauce is cooling to clean the dishes created in earlier steps!

Stir in the chopped basil leaves once the sauce has cooled and everything has been incorporated.

To assemble the wraps, place a medium tortilla on a clean surface and layer a handful of spinach leaves on one side. Spoon ~1 tbsp. of sauce over the spinach and spread it out a little using the back of the spoon. Place a chicken strip over the sauce (above-left).
To wrap it up, fold the edge with the filling tightly around the chicken. Push in the corners and fold in the top and bottom edges. Continue to wrap everything tightly and fold in the corners that are created as you roll (above-right).

Overall, I would give this recipe a 5/5. Served warm or cold, the infamous sauce lends itself really well to being used in wrap form.
Although you may feel a little impatient while incorporating the sauce, the flavour is absolutely worth it (as is not just taking a bite of pure olive oil). Don’t skip the spinach either! The sauce is very rich and, although just using 1 tbsp. helps a little, the greens are really what stops it from becoming overbearing.
VEGETARIAN? The chicken inside can easily be substituted for Beyond Meat alternatives. However, if you’d like to change it up, reduce the amount of sauce used and pack the wrap with your favourite bagged salad! I’ve done this a couple times now and it’s tasted great!
Feywild Eggs
(w/ my favourite add-ins)

[Feywild Eggs are] a delightful presentation of creamed, herbed, and fluffed eggs, completed over even heat for a golden crisp finish. Some have even claimed this simple recipe descended from the leShay, an immortal breed of fey “elves” with incredible, godlike powers. - Heroes’ Feast, p. 58
Eggs are one of the most versatile foods around. Scrambled with cheese, added to rice, mixed with greens - there’s nearly no limit to the variations. Easy to pick up the basics, they make a great introduction food for anyone looking to start their cooking journey. The only trick to these eggs is to make sure you have the proper pan for the job!
The Feywild Eggs frittata in Heroes’ Feast makes a great base for any number of combinations you can think of, anytime of the day. Due to all of the possibilities, I couldn’t possibly cover all options in this post. So, I’ll be covering the base recipe through the post and will discuss my favourite add-ins and how I cooked them in the results section!
For a complete feast, eat them with the Yawning Portal Buttermilk Biscuits (p. 31) and Otik’s Skillet-Fried Spiced Potatoes! (p. 20)
See below for my notes on the results and for some helpful tips and tricks when making this yourself! Get Heroes’ Feast here: https://dnd.wizards.com/heroes-feast
Prep Time: 10 mins Cook Time: 35 mins Overall: 45 mins*
* Will take longer if you are preparing and cooking add-ins.

For the ingredients:
9 eggs
¼ cup (23 g) freshly grated Parmesan cheese
⅓ cup (20 g) finely chopped mixed fresh herbs (ex. parsley, basil, dill, mint, tarragon, lovage, or celery leaves
½ tsp. (3 g) kosher salt
Freshly ground black pepper
2 tbsp. (30 ml) extra-virgin olive oil
1 yellow onion, finely chopped
5 oz., about ½ cup, (140 g) Fontina, Colby, Monterey Jack, Havarti, or Gouda cheese, finely diced*
* If looking to reduce the fat content, feel free to use half the suggested amount of Parmesan cheese and cubed cheese.
Warning: Make sure the skillet you use is oven-safe to 400℉
NOTE: The cook’s note in Heroes’ Feast gives suggestions for veggies and meats to use with the frittata (asparagus, sautéd bell peppers, sliced mushrooms, etc. and cooked crumbled bacon or sausage). The only point of concern is to make sure they have all been seasoned and cooked through in the pan before adding the egg mixture.

First, I preheated the oven to 400℉ (204℃).
Next, I beat together the eggs, Parmesan cheese, herbs, salt, and some pepper until the mixture was uniformly blended.

After combining the egg mixture, I heated my 10-inch nonstick skillet over medium-high heat and warmed the olive oil until shimmering. Then, I added the onion and let it cook, stirring frequently, until it softened - about 3 minutes.
REMINDER to cook all of your add-in veggies and meats in the skillet before adding the eggs! See the results section for my favourite add-ins and how I cooked them up.

Once the onion softened, I added the egg mixture to the skillet and let it cook, undisturbed, until the edges began to set and bubbles appeared in the center - about 1 minute (upper-left).
Then, I sprinkled the diced cheese evenly over the eggs (upper-right).

After assembling, I transferred the skillet to the middle oven rack and baked the frittata until the center had set and it puffed up - about 14 minutes.
NOTE: The frittata will puff a lot in the oven, so make sure your oven rack is in the middle!

After taking the skillet out of the oven, I ran a flexible nonstick spatula around the edges of the frittata to loosen it for transfer onto a serving plate.
I let it cool for about 15 minutes then cut it into wedges. It can be served warm or at room temperature.
NOTE: Don’t panic when it deflates as you loosen it from the skillet and transfer - it’s meant to do that!

Overall, I would give this recipe a 3.5/5 on its own and a 4.5/5 when you include add-ins. As stated in the introduction, the base Feywild Eggs recipe is a great starting point to build on but really needs the extras to not taste bland.
For my personal favourites, I used Italian parsley, 1 cup (130 g) chopped asparagus, and 1 cup (70 g) sliced mushrooms. Like the original recipe, I mixed in the finely chopped Italian parsley with the eggs. To cook veggies, I heated 2 tbsp. olive oil on medium heat until shimmering and then added the onion, asparagus, and mushrooms at the same time. I seasoned them with salt and pepper in the pan then cooked, stirring frequently, until the asparagus softened and the onions were a translucent golden brown - about 5 minutes.
UPDATE:
Since making this post, I have some new tips and tricks for you guys!
If you’re substituting the bacon for smoked turkey like I did, don’t throw out the bone right away! While the potatoes and veggies simmer, add the smoked turkey leg bone to the broth. Don’t worry about any meat bits that fall in, they’ll get incorporated in the blender. Not only will this provide more flavour to the broth but you’ll get extra nutrients from the bone marrow! NOTE: Do your best to keep the bone as intact as possible as you’ll need to pull all the bone bits out before blending.
To reduce the fat content and make it an appetizer-soup, I substituted milk instead of cream and it worked out great! The only adjustment needed was to let it thicken for 6-7 minutes instead of 1 minute.
Potato Leek Soup (w/ Smoked Turkey)

Served year round, this dense and nutritious vegetable blend is perfect for warming the limbs and souls of dwarves subjugated to the unrelenting cold of damp subterranean life. - Heroes’ Feast, p.97
There’s something very comforting about a rich, creamy soup on an overcast day. Whether rain or snow, its warmth gives you a sense of homely comfort and raises your spirits.
I’d never tried potato and leek soup before attempting this recipe and was skeptical at first; how good could some leeks and potatoes be? However, I was blown away by taste! Delicious and filling, this Potato Leek Soup is sure to satisfy your hunger while giving you those reading-a-good-book-on-a-rainy-day vibes. Make sure to dip a thick slice of sourdough bread from your nearest bakery in it for an even more knock-your-socks-off taste!
As an added bonus, this soup is easily made vegetarian! See the results sections to find out how.
See below for my notes on the results and for some helpful tips and tricks when making this yourself! Get Hero’s Feast here: https://dnd.wizards.com/heroes-feast
Keep reading
Vedbread

Traditionally prepared with sharp “ved” cheese and presented with onion butter, these crusty buns are best served warm, [...] this particular recipe comes from Lorren’s Bakery in Faerûn’s Village of Red Larch, and features mushrooms and cheese from local, outlying farms. - Heroes’ Feast, p. 27
Ever since I first started looking through Heroes’ Feast, Vedbread has been one of the recipes I’ve been most interested in trying. Although they may appear a little strange at first glance, the best way to describe them would be a ‘savory cinnamon rolls’. The mushroom filling mixed with the cheesy dough gives the buns an awesome flavour combo!
Delicious and filling, these buns are sure to make an interesting alternative to a typical lunch or midday snack. Not only that, but they’re great for a fall aesthetic as the perfect match for a steaming cup of broth!
See below for my notes on the results and for some helpful tips and tricks when making this yourself! Get Heroes’ Feast here: https://dnd.wizards.com/heroes-feast
Prep: 15 mins Cook: 60 mins Overall: 1h 15 mins

For the filling ingredients:
12 ounces (345 g) cremini mushrooms, coarsely chopped*
2 tbsp. (28 g) unsalted butter
2 shallots, finely chopped
Kosher salt
1 tsp. (1 g) finely chopped fresh thyme
¼ cup (23 g) freshly grated Parmesan cheese
Freshly ground black pepper
For the dough ingredients:
2¼ cups (281 g) all-purpose flour, plus more for rolling
1 tbsp. (14 g) baking powder
1 tsp. (4 g) sugar
½ tsp. (3 g) kosher salt
6 ounces (170 g) Gruyère cheese, coarsely grated
¾ cup (177 ml) buttermilk, cold
6 tbsp. (85 g) unsalted and butter, melted and cooled
1 egg
Truffle oil for brushing (optional)
* Heroes’ Feast mentions you can substitute the cremini mushrooms with the same amount of shiitake.
For the filling:

First, I pulsed the mushrooms in the food processor until they were very finely chopped (about 8-10 pulses).

Next, I cooked the mushrooms:
I melted the butter over medium heat and cooked the shallots until they began to soften - about 2 minutes;
I adjusted the heat to medium high and added the processed mushroom and ¼ tsp. salt. While stirring I cooked them until all of the liquid from the mushrooms had evaporated - about 9 to 12 minutes (keep an eye on it);
I added the thyme and cooked, stirring, until fragrant - about 1 minute;
I removed the skillet from the heat and stirred in the Parmesan.
After cooking, taste the mixture and adjust the seasoning with salt and pepper. I found there was enough salt but needed a couple shakes of pepper.

After seasoning, I spread the mixture on a plate to cool for assembly.
Then, I preheated the oven to 425℉ (218℃) and lined a large rimmed baking sheet with a piece of parchment (you could also use a reusable silicone liner).
For the dough:

To prepare the dough, I started by whisking the flour, baking powder, salt, and sugar together in a large bowl. Then, I stirred in the grated Gryère cheese.

Next, in a small bowl, I whisked together the buttermilk and cooled melted butter. The butter will clump, this is normal.

I added the buttermilk mixture to the flour mixture and used a wooden spoon to form a chunky dough.
Heroes’ Feast notes that the dough should be sticky at this stage. However, I found it to be rather dry - with bits and pieces of cheese and flour not being incorporated. Don’t worry if your dough turns out similarly. Mine incorporated into a stickier dough while kneading.

After creating a chunky dough, I turned it out onto my breadboard and kneaded until it held together and was mostly smooth - about 4-5 minutes. Take care not to overknead.
After creating the dough ball, I floured the board and under the ball to keep it from sticking to the surface while rolling out.
TIP: The techniques I use for kneading (and a helpful video) can be found on my post about Dwarven Flatbread.
Assembly:

To start the assembly, I rolled out my dough ball into a roughly 12 by 18-inch rectangle. Dust off any excess flour from the surface.

Next, I spread the mushroom mixture over the entire surface. Expect the layer to be thin and patchy.

To roll the vedbread, I started by working with the widest side (18-inch) furthest from me. I then rolled the dough into a very tight, even, compact cylinder towards me.
When I finished rolling, I pinched the seam along the entire length of the cylinder to close it.

Next, using a serrated knife in a sawing motion, I trimmed off the ends of the cylinder to discard and cut the remaining cylinder into 1 ¼-inch pieces.
NOTE: When you make these, you will find it makes about 14. I only have 11 because I misread the dimensions for rolling out the dough.

I arranged the buns cut-sides up on the baking sheet and brushed the top and sides with eggwash - an egg beaten with 1 tbsp. water (above-left).
I cooked them for 18 minutes on the middle rack of the oven until they were golden brown, rotating the baking sheet halfway through. I let the buns cool on the pan for about 5 minutes before transferring them to a wire rack.

I let the buns cool on the wire rack for a little while before storing them. They are best eaten warm or at room temperature (would not recommend cold).
If using, brush the buns with some before serving.

Overall, I would give this recipe a 4.5/5. If it’s not already obvious from the ingredients list, these buns are very mushroomy.
I would suggest trying these buns both at room temperature and warm out of the oven to see how you best enjoy them. Personally, I found the taste of the mushrooms mellowed when left at room temperature and made them much more enjoyable. On the other hand, my dad, who doesn’t particularly enjoy mushrooms, found them tastier warm. So make sure to try them both ways and see how you feel.
There’s a general tip that it’s best to store baked goods in a paper bag at room temperature to keep the crust harder on the outside and softer on the inside. However, I would advise against this for these buns. The dough is too thin to benefit from this and will just go stale-ish - like they’d been left uncovered on the counter. Keeping them in an airtight container is the best way to preserve that softness that you get right out of the oven.
Want to enjoy them again later? No trouble! Reheat them at 300℉ (149℃ ) for about 8 minutes to snack on them warm.
Halfling Oatmeal Sweet Nibbles

“Dense with oats, chocolate chips, and butterscotch, these diminutive cookies are perfect for halfling hands… and the stomachs of everyone.”- Heroes’ Feast, p. 128
Whether you’re looking to make tasty treats for yourself or something sweet for a bake sale - cookies are the ultimate go-to. With so much deliciousness packed into something that’s simple to make, they’re the perfect choice!
The chocolate-butterscotch chip cookies from Heroes’ Feast will knock your socks off when you try them! Served at room temperature, these little guys are the perfect combination of crunchy on the outside and soft, chocolaty goodness on the inside.
They’re also the perfect addition to any lunchbox! Their small size makes them easy to nibble on and easier to share! So, why not impress friends, both old and new, with a batch of these bad boys? They’re sure to be a hit!
See below for my notes on the results and for some helpful tips and tricks when making this yourself! Get Heroes’ Feast here: https://dnd.wizards.com/heroes-feast
Prep Time: 5 mins Cook Time: 55 mins Overall: 60 mins

For the ingredients*:
1 ½ cups (190 g) all-purpose flour
2 cups (180 g) rolled oats
1 tsp. (1.25 g) baking soda
½ tsp. (3 g) kosher salt
1 ½ cups (255 g) packed light brown sugar
1 cup (128 g) unsalted butter, at room temperature
1 egg, beaten
2 tsp. (10 ml) pure vanilla extract
1 cup (150 g) semisweet chocolate chips
1 cup (150 g) butterscotch chips
* Heroes’ Feast says that this makes ~45 cookies. I made 40.

First, I preheated the oven to 350℉ (177℃) and lined two large baking trays with parchment paper. You’re going to be baking 2 trays at a time, so move both of your oven racks to the middle of the oven (one in one set of grooves and the other directly below it). It will look like a tight space, but the tray and cookies will fit!
Next, I whisked together the flour, rolled oats, baking soda, and kosher salt in a bowl.

In a large bowl, I started by beating the butter and brown sugar until well combined (upper-left). Then, I added the egg and vanilla extract and whisked until smooth (upper-right).

Once the wet ingredients were combined, I stirred in the dry ingredients (upper-left). Then, added the chocolate and butterscotch chips and mixed until they were well-distributed (upper-right).

To bake the cookies, I scooped rounded tablespoons of batter and placed each one on the baking tray 2 inches apart (upper-left). I baked them for 15 minutes, rotating the positions of the pans halfway through.
Heroes’ Feast advises that smaller cookies will take less time to cook and that reusing trays will significantly cut the cooking time - so keep an eye on later batches.
I misread the directions for the first tray (left tray in upper-left) and rolled the batter after scooping it instead of just placing it on the tray. You can see how they turned out differently in the upper-right picture. They have much more of a smooth “traditional” cookie shape to them as opposed to the cookies on the right tray that look more rustic and bumpy. More about my thoughts on this in the results section.

After the cookies baked, I let them cool on the tray for around 3 minutes and then transferred them to a wire rack. I repeated this process until I ran out of batter.

Overall, I would give these cookies a 5/5. They are incredibly rich and the perfect cure for any sweet tooth. Due to the large amount of sugar in them, I don’t recommend eating them with Hot Cocoa Broth (p.188). Rather, they make a great snack while enjoying a cup of black tea (red rose, earl grey) or coffee.
As mentioned in a previous step, I rolled out the batter for the cookies on one of the trays before placing them. In my opinion, I prefer the ones made this way over just placing them on the tray. Rolling the batter allows for more structure and gives the cookies a nice soft interior.
To keep them fresh, keep them in an airtight container at room temperature for up to 3 days. They can also be kept in an airtight container in the fridge for up to a week - though you’ll want to give them a few minutes to warm up on the counter before snacking!
FUN FACT: These cookies were so popular in my house that I only had five cookies left by the time I took the first and last pictures! (I started with 40!)
The Ultimate Sausage Pasta

“This is the best pasta I’ve ever had” - Everyone who’s tried it
Living with other people is a valuable experience for any young person - especially when you get the chance to share meals and recipes. It’s amazing what kinds of foods you can add to your cooking arsenal and this pasta is one of them!
Originally introduced through the friend of my housemate, I can say with absolute confidence that this is the best pasta I, and everyone who's tried it, has ever had. The best part? It only takes half an hour to make!
With it’s quick cooking time on consistent heat, easy steps, and simple ingredients, it makes for the perfect meal for everyone from an on-the-go student looking for a cheap, filling meal to a busy professional.
VEGETARIAN? No problem! Check the results sections for tips on changes to make the recipe work for you.
Prep: 5 mins Cook: 25 mins Overall: 30 mins

For the ingredients:
Half a bag (450 g) Rigatoni pasta
500g mild italian sausage, sliced into 3/4-inch pieces (I recommend Johnsonville brand, if available)
4 large cloves garlic, finely chopped
2 tbsp. sundried tomatoes in oil, sliced
2 tbsp. oil from the jar
1 cup (250 ml) low-sodium chicken broth*
1 block (150 g) chopped frozen spinach**
½ cup (125 ml) heavy cream (35%)***
* Feel free to use any homemade chicken broth or stock you have for a deeper flavour! If you store your homemade broth in the freezer using ice-cubes, you’ll need about 8 for a cup.
** If you’ve got the chopped frozen spinach that comes in little cylinders it’s about 3 of them. If you only have frozen whole leaf spinach (like I did here), take it out of the package and stick it in the microwave on a plate until it starts to defrost. Then, chop it up!
*** Feel free to use either 35% “cooking cream” or “heavy cream”. I’ve used both and haven’t noticed a difference. Do not use lighter creams as substitutes. You will end up with a cream soup instead of a cohesive sauce.

Start by boiling your pasta according to the directions listed on the package - straining it about 1 minute before it reaches al dente.
Next, heat up a high-rimmed skillet on medium heat and add your sausage. Allow it to fully cook through, about 12 minutes (internal temp of 160℉), stirring occasionally.

After the sausage has fully cooked, add the garlic, sundried tomatoes, and oil. Mix it with the sausage and cook until the garlic starts to turn a golden colour (2-3 minutes), stirring frequently.
TIP: After finely chopping your garlic, use the flat side of the knife to crush it. This will allow more flavour to release from the garlic.

Add the chicken broth and scrape the bottom of the pan to loosen any bits that got stuck. Allow the broth to come to a boil.

Add the frozen spinach to the boiling broth, breaking it up as it thaws. Allow it to cook until no frozen chunks remain, about 3-4 minutes.
NOTE: At this stage, you’ll probably start to think that there’s too little sauce in the pan, but resist the urge to add extra broth.

Add the heavy cream and stir. Allow it to come to a boil and incorporate, stirring frequently, for 2 minutes.
You might need to add a little more cream as it cooks. Ideally, you want the sauce to have taken on the lighter colour of the cream but still be able to see the darker colour of the broth.
NOTE: This was made with homemade chicken stock - giving it a deeper colour when the cream is mixed in. You’ll find your sauce to be much lighter if using store-bought broth.

Finally, keeping the heat on medium, add your strained past. Stir until you can see the sauce clinging to the noodles and making them shiny, about 2 minutes. There should only be a little sauce remaining at the bottom of the pan.

Overall, I would give this pasta a 5/5. I’ve honestly never made a recipe that everyone unanimously agrees is a hit with no changes. It’s so quick and easy that I make it almost every week without fail. In fact, I'm making it tomorrow!
As I’ve mentioned in the introduction, I would highly recommend this to anyone who is just starting to learn how to cook. The entire meal cooks in 30 mins on the same heat and is extremely forgiving. Perfect for those starting to venture past instant noodles and freezer meals!
EATING VEGETARIAN? No problem!: I’ve made this dish vegetarian several times and although you do lose some of the flavour, it’s still amazing.
To substitute the sausage, I’ve either taken it out completely or I’ve used Beyond Meat sausage. Personally, I would recommend leaving the BM sausage out as it has a strange texture. If you enjoy BM and want to add it, add 2 tbsp. of neutral oil to the pan while heating it. Add the sausage and cook for 8 minutes, stirring frequently.
You can substitute the chicken broth with vegetable broth. I would also recommend adding ~1 tsp. italian seasoning with the broth (like the one used in the dwarven flatbread, but maybe skip the marjoram). This should make up for the loss of spicing from the sausage.
Hand Pies
(Includes small, snackable pies!)

“The variety [of hand pies] presented below, made famous at Cuttle’s Meat Pies located in Waterdeep’s Trades Ward, is flavored with bacon and leeks and is extremely popular across the Heartlands, the Dales, and even the Savage Coast of Faerun, where hungry adventurers simply can’t get enough of them.” - Heroes’ Feast, p. 21
I think we can all agree that pie is one of the best foods ever (take that cake lovers). But, why should its awesomeness only extend to fruit, pudding, or whatever olden times had going on?
The Hand Pies in Heroes’ Feast are a great, filling meal to close to a long day. Packed with awesome carbs, proteins, and spices, they’re hard to resist!
I was really interested to see if there was a way to turn the traditional, larger pies into snackable finger foods that could be brought to school or made for a party. After a little bit of testing, I found that they could! Since my main goal for this post was to create the snackable ones, I will be incorporating my process into the main body of my review instead of just keeping it to the notes after each step.
Although not the fastest meal to make, there are several ways to speed up the process and give yourself less work!
See below for my notes on the results and for some helpful tips and tricks when making this yourself! Get Heroes’ Feast here: https://dnd.wizards.com/heroes-feast
Prep Time: 20 mins Cook Time: 2h 40 mins Overall: 3 h
* See results section for how to cut down vegetable prep time
** Prep time will increase if you’re making your own pie crust

For the ingredients:
6 slices thick-cut bacon*
1 large (about 8 ounces) Yukon gold potato, peeled and cut into ½-inch pieces
2 leeks, white and light green parts, halved lengthwise and thinly sliced
1 tbsp. (3 g) finely chopped fresh thyme
Kosher salt and freshly ground pepper
4 cloves garlic, finely chopped
1 pound (500 g) ground beef**
2 tbsp. (16 g) all-purpose flour
⅔ cup (160 ml) low-sodium chicken broth
¼ cup (60 ml) chopped fresh parsley
Pastry for 2 double-crust pies (about 1 ½ pounds), thawed if frozen
1 egg
Ketchup, grainy mustard, or steak sauce to serve (optional)
* I couldn’t find any thick-cut bacon at my grocery store, so I used double the amount of regular cut bacon instead.
** I used medium ground beef.
Preparing the Filling:

I cooked the regular cut bacon in batches in order to avoid crowding the pan. Because I was using thinner bacon, I had to cook the bacon all the way until crispy instead of just slightly browned.
I didn’t have enough rendered fat after cooking for the 2 ½ tbps. required in the next steps. To make up for it, I supplemented the missing amount with a neutral-tasting oil (like vegetable, canola, safflower, and grapeseed).

For the vegetable mixture, I first cooked the potatoes in 1 ½ tbps. of the reserved fat over medium-high heat. This took about 7 minutes, stirring frequently (above-left image).
Next, I added 1 tbsp. reserved fat, leeks, thyme, and ½ tsp. salt to the potatoes and cooked them for about 4 minutes. Then, I added the garlic and stirred it in until fragrant - about 1 minute.
Finally, I transferred it to a bowl, wiped out the pan, and returned it to medium-high heat.

For the beef mixture, I cooked the ground beef until it started to lose its pink colour (4-5 mins). You want to make sure you’re breaking up any large clumps as it cooks.
Next, I turned down the heat to medium and added the flour, stirring constantly for 1-2 minutes. After, I added the broth and ¾ tsp. salt, scraping the skillet to dissolve anything that got stuck to the bottom. The above-right image is what the beef mixture looked like after cooking it for 2 minutes. It shouldn’t be super liquidy.

Above is what the hand pie mixture looked like when I combined the vegetable and meat mixtures. After combining, I allowed the mixture to cool for about 20 minutes (barely warm).
When the mixture cooled, I incorporated the crumbled bacon and parsley. Finally, I covered it with cling wrap and put it in the fridge.
NOTE: To adjust the seasoning at this point, I would recommend only using pepper. I found the mixture was plenty salty.
Constructing the Pies:

First, I preheated the oven to 375℉ and lined two baking sheets with parchment paper. You could also use nonstick silicone liners.
Since I was using a homemade pie crust, I divided my dough into quarters then rolled them out on a lightly floured work surface until I could see the surface through the dough. I lightly floured the top of the dough and my rolling pin to keep the dough from sticking to it. Follow the same method if using store-bought dough.
To prevent the dough from breaking while chilled: start by rolling it out a little in one direction, rotate 90°, roll it out a little, and repeat. This way, you’re not just stretching the dough in one direction.
As you work with the dough, try not to let it get too warm! The chilled butter is what gives the pie crust a flaky texture. If you feel the dough start to warm up too much as you work with it, cover it with a clean, damp kitchen or damp paper towel and place it in the fridge for a few minutes before continuing.
If you notice any tears appear while you roll out the dough, overlap a bit of the dough in that area and roll over it using the rolling pin. If the tear is too large to do this, patch it up with some dough scraps and roll over it to seal it.

To create envelopes for the filling, I used a stencil to create 10 by 8-inch ovals for the large ones and used a ~3 ¾-inch diameter circular cookie cutter.

From my dough, I was able to get two large pies and 15 smaller ones (not using all the dough scraps will net you about 12).
NOTE: A bench scraper and/or a thin metal spatula is your friend while working with the dough. To make the pies easier to fold and transfer, make sure to go around and lift up all of the dough from the work surface.

For the large pies, I placed one cup of filling on the bottom third of the dough and left ~1 ½ inches for the border (above-left).
For the small pies, there are a few changes I would make with how I constructed them (above-right). Although using only a ½ tbsp. of filling made them easier to handle, you should absolutely use between ¾-1 tbs. instead. You may not get as clean of a seam, but it will help the pies stay juicy and have a better dough-to-filling ratio.
Also, I would consider using a slightly larger cookie cutter (4-inch diameter) and shaping the dough to be more like an oval. I think this would help with the difficulties when using more filling.
Finally, be mindful of how much filling you’re making/using. The amount of filling called for in the recipe is great when making four large pies but significantly less is needed when constructing the smaller ones. Out of the 15 made, adjusting for the recommended increase in filling would mean just barely 1 ½ cups is needed!
To ensure minimal food waste when only making the mini-pies, either make 2.5 times the amount of dough or make ¾ the amount of filling.
Put the filling for the little ones on the bottom half of the circle/oval leaving room for sealing and crimping.

To seal the pies, I started by dipping my finger in water and going around the seam to moisten it. Next, using my bench scraper, I folded the dough over the meat filling. Finally, I used a fork to crimp the edges closed.
If you notice any breaks in the dough while you’re folding/crimping, don’t worry! Use any spare scraps of dough to cover the tears. If a tear appears when crimping the edges, cover it with scrap dough and crimp it down.
Each regular-sized hand pie took about 8 mins to assemble from rolling it out to sealing it. So, it will take you around half an hour to do all four (at least the first time).
The snack-sized pies took about 8 minutes for 4 of them. Therefore, it will take you just under half an hour to make 12 of them. When I put together all of my dough scraps for the little ones, I was able to make 3 extra snack pies - 15 in total.
Always use your bench scraper or flat metal spatula when working with or picking up the pies.
TIP: Because each pie takes time to construct and because we want the pie crust to stay cool, place each fully constructed pie in the fridge after sealing it. For the smaller ones, place each batch of 4 in the fridge as you finish them.
TIP: If you’re running out of space in your fridge for the baking sheets, use a cooling rack to place one tray on top of the other.
TIP: Wait until the pies have chilled in the fridge to score the X. It’s much easier to cut into the firm dough than the softer one.

Above is what the pies looked like before and after baking in the oven for about 40-45 mins. Be generous with the egg wash to give each pie a nice golden brown colour.

Above is what the pies looked like as they cooled - about 5 to 10 mins. Be mindful when transferring the large ones to the wire rack. They are very easy to break.

Overall, I would give this recipe a 4.5/5. Both the regular and the snack sized hand pies were delicious. Although, I would recommend eating the larger pies with a fork. They were a bit too flimsy to be eaten by hand. However, the filling to pie crust ratio was perfect.
As mentioned in the filling step, the only changes I would make to make the snack pies better would be to use a slightly larger cookie cutter and use more filling. Other than that, they were amazing. Everyone in my house agreed that they would make for great appetizers or finger foods for a party because “you can eat them and just feel like you’re snacking”. You can even turn the assembly into a fun activity (or pass off the work to guests who like to arrive early)!
I would highly recommend not making this a one-day event. As the longest hands-on recipe so far, I would split up the work as follows:
Make the filling the day before
Make the pie crust and construct the pies the day of
Not only will this division of work make the recipe less daunting but it will allow the filling to chill completely - making it much easier to handle.
TIP: Although the prep time seems a little daunting, you can save time by completing certain parts of it while cooking. For example:
Cut up the potatoes and leeks while the bacon cooks
Chop up the thyme while the potato chunks cook
Super Flaky All-Butter Pie Crust

No matter the filling you use, the backbone of any good pie is the light, buttery, melt-in-your-mouth crust. As such an important part of the pie experience, it can seem very daunting to make it yourself: you need to keep the dough cold, not overwork it, and why does every recipe want lard or shortening?!
Luckily, after much time searching, I have found the most amazing recipe combo that has all of the buttery-flakiness you expect from a pie crust with minimal effort!
In addition to wanting to learn how to make pie crust, I decided to give it a go because Heroes’ Feast calls for a lot of “sheets of pie crust” and no matter how hard I searched my grocery stores, I could never find it. So, I hope that all of you in a similar situation can use this for your pies! You’ll find that going back to store-bought will never be the same.
See below for my tips and tricks for making your own buttery, super flaky crust at home!
(This recipe is both inspired by and a modification of Katy Perry’s pie crust (here) and a food processor method I found (here))
Prep: ~5 mins Cook time: ~1h 15 mins Overall: ~1h 20 mins

For the ingredients:
2 ½ cups (313 g) all-purpose flour
20 tbsp. (284 g) salted butter
½ cup (118 ml) ice-cold water
TIP: If you don’t have salted butter, use 20 tbsp. unsalted butter and add ½ tsp. + ⅛ tsp. of kosher salt.

If using salted butter, add 1 ½ cups (188 g) of flour to the food processor.
If using unsalted butter, combine 1 ½ cups (188 g) of flour and salt in a food processor and pulse to combine (4-5 pulses).

Scatter butter cubes over the flour mixture and process until dough or paste begins to form (above-left). This should take ~15 secs and there should be no uncoated flour.
Next, redistribute the flour-butter mixture in the food processor (above-right).

Add the remaining 1 cup (125 g) of flour and pulse until the flour is properly distributed and becomes crumbly. This usually takes me ~7-8 pulses.

Transfer dough to a medium-sized mixing bowl. To help keep the dough cool, I put the bowl in the fridge when I start preparing the ingredients.
Sprinkle 4 tbsp. of ice-cold water over the dough. Use a rubber spatula to press the dough pieces together until they start to form larger clumps.
To test if it’s ready, take a piece of dough and pinch it between your fingers (above-left). If it holds together, you’re good to go. If it crumbles, add 2-4 more tbsp. and keep combining.
Once the dough is ready keep the dough in the bowl or transfer it to a clean surface and work it just enough so that it forms a ball.
NOTE: I would definitely advise starting with 4 tbsp. of ice-cold water. I thought I had added enough after 2 tbsp. (directed in Katy Perry’s recipe) but the dough kept breaking when I took it out of the fridge to roll out. This isn’t as much of an issue when using 4 tbsp.

Cut your dough ball into two halves and press them into discs. Wrap each half in cling wrap and let it chill in the fridge for at least an hour or up to 2 days before rolling it out (it should feel super hard).
If you’re pre-making your dough, it can stay in the freezer for up to 3 months! Just remember to thaw it out in the fridge overnight before using.

Personally, I would rate this pie crust recipe a 5/5. As long as you take care to not let the dough get too warm, your pie crust will be as buttery, light, and flaky as can be!
The pies shown in this post are the Elven Maruths on p. 64. Get the book here!: https://dnd.wizards.com/heroes-feast
Dwarven Flatbread

According to folklore, these tasty flat loaves weren’t created in the kitchen, but rather at the forge as ever-industrious, hungry dwarven craftsmen utilized the only materials they had available: flour, oil, water, salt, a hearth, and a hammer.” - Heroes’ Feast, p. 103
I've been interested in making flatbread for about a year now but always felt strangely intimidated by it. It wasn’t until I found this recipe and saw how quickly and simply it could be done that I decided to give it a shot.
Simple yet absolutely delicious, this wonderfully seasoned flatbread has just enough of a spice kick for it to stand out on its own or when eaten with the Fire Lichen Spread (p. 93) or a tzatziki dip!
Previously attempted by @afinickyguide, this review looks to take their suggestions to heart while also adding some of my own!
See below for my notes on the results and for some helpful tips and tricks when making this yourself! Get Heroes’ Feast here: https://dnd.wizards.com/heroes-feast
Prep time: ~5 mins Cook time: ~40 mins Overall: ~45 mins

For the ingredients:
1 ½ cups all-purpose flour, plus more for dusting
1 ½ tsp. baking powder
½ tsp. baking soda
1 ½ tsp. kosher salt*
2 ½ tsp. dried herb blend (such as Italian seasoning, herbes de Provence, or za’atar), crushed **
3 tbsp. extra-virgin olive oil
⅔ cup plain low-fat Greek yogurt or whole milk***
¼ cup neutral-tasting oil, such as vegetable, canola, safflower, or grapeseed
* This is way too much salt. Use half of this amount (¾ tsp.).
** I didn’t have any Italian seasoning, so I used ½ tsp. each of dried basil, oregano, rosemary, thyme, and marjoram as well as ¼ tsp. red pepper flakes (modified from here)
*** I used 2% plain greek yogurt.
I use the following conversions in my cooking:
1 ½ cups all-purpose flour = 188 g
1 ½ tsp. baking powder = 6 g
½ tsp. baking soda = 4 g
1 ½ tsp. kosher salt = 8 g
½ tsp. dried rosemary = 1 g
½ tsp. dried basil = 0.5 g
½ tsp. dried oregano = 0.5 g
½ tsp. dried thyme = 0.5 g
½ tsp. dried marjoram leaves = 0.25 g
¼ tsp. red pepper flakes = 0.5 g
3 tbsp. extra-virgin olive oil = 44 ml
⅔ cup plain low-fat Greek yogurt = 158 ml
¼ cup neutral-tasting oil = 60 ml

Above shows the dry ingredients whisked together with a well in the center for the greek yogurt and olive oil.
Again, when I made these the first time 1 ½ tsp. kosher salt was way too much. I made them again using half the amount (¾ tsp.) and they tasted much better.

Above is what the dough looked like after combining it with a wooden spoon and then working it by hand to create a shaggy dough.
The dough will be very dry and have lots of crumbly bits. Don’t worry! As you knead it into a smooth ball, the dough will become wetter and everything will incorporate nicely.

Above is what the dough looked like after kneading to make it smooth - about 5-6 minutes. You’ll know the dough is ready when it springs back after lightly pressing into it.
Although the dough will become tackier as you knead it, try not to add any more flour. Dough, in general, will absorb any extra flour you give it and though it might make it slightly easier to handle, the bread will become denser as a result.
Personally, I found the dough didn’t stick much to my bread board and when it did it was easy enough to handle with just a bench scraper.
The following link is a great resource to develop your technique for kneading bread. With the first technique, you use the heel of your hand to press into the dough, then fold it back into itself, turn it, and repeat. Using the second technique, you roll the dough with the heel of your hand in a “heart” motion.

Above is what the dough looked like after being divided into 8 equal portions and left to rest for 15 minutes under a clean kitchen towel. The smooth dough weighed around 400 g and divided nicely into 50 g portions.
Although you will notice the dough has expanded after resting, don’t expect as drastic a change as yeasted dough.
With the amount of dough in each portion, rolling it to 7 inches in diameter turned it into paper and gave it “cracker-like results” according to @afinickyguide‘s post. So, I opted to roll them to 5 inches in diameter and just under ¼ of an inch thick.
If you’d really like some larger flatbread, I would recommend taking @afinickyguide‘s suggestion and doubling the recipe to create 8 larger portions that could be rolled into 7-inch circles.

I found the cooking times in Heroes’ Feast to be way too long. When I originally tried frying it for 2.5 minutes, it turned out super burned when I flipped it - and that was before the pan had accumulated heat!
I would suggest the following cooking times for this recipe (using flatbread rolled to 5 inches in diameter):
While the pan is heating up, cook the first flatbread for ~90 secs on the first side and 60 secs on the other
For the second, cook for 30 seconds on the first side and 20 on the other
For each one after, cook for 15 seconds on the first side and 10 on the other
Also, don’t replenish the pan with 1 ½ tsp. oil for each flatbread if following my instructions! There was so much oil left after each one that it’s much better to swirl around and reuse the leftover oil in the pan. Only add ~½ tsp. more if you notice the oil level running low.
NOTE: I used a cast-iron skillet to cook my flatbread. Timings will vary based on the type of pan you use.

Overall, I give this flatbread a 5/5. After the adjustment of the salt content, these were delicious to eat both on their own, with a tzatziki dip, or with the Fire Lichen Spread (p. 93).
Although I can’t comment on how they would taste with store-bought Italian seasoning, the one I used (listed in the ingredients section) worked amazingly!
For best freshness results, wrap in plastic wrap or store in a reusable sandwich back and keep in the fridge. They will last up to a week in the fridge. To reheat, either leave them on the counter for half an hour before using or microwave them for 10 seconds at a time until soft.
Bytopian Shepherd's Bread

This spiced bread, served in thick slices, is made from grains imbued with grated carrots and rich chunks of almond [...] If you ever find yourself in possession of the rare herb known as shiftspice, sprinkle a liberal pinch into the batter to ensure that each loaf yields an unexpected flavour. - Heroes’ Feast, p.176
Carrot cake is something that many of us have grown up with one variation or another. Whether it’s a recipe passed down from your grandmother or a slice you pick up at your local coffee shop, this staple has a place in heart and home.
The Bytopian Shepherd's Bread in Heroes’ Feast certainly lives up to the legacy of this treasured treat. Amazingly spiced and not overly sugary, it is sure to be the perfect loaf to serve at breakfast or for dessert!
As a bonus, check out the results section for a delicious quick-and-easy cream cheese icing recipe to go with this carrot cake!
See below for my notes on the results and for some helpful tips and tricks when making this yourself! Get Heroes’ Feast here: https://dnd.wizards.com/heroes-feast
Prep Time: ~20 mins Cook Time: ~1h 45min (15 mix. + 1h 15 cook + 15 cool) Overall: ~2h 05 + cool to room temp

For the ingredients:
2 cups. all-purpose flour
2 tsp. baking powder
½ tsp. baking soda
2 tsp. ground ginger
1 tsp. ground cinnamon
½ tsp. freshly ground nutmeg
1 tsp. kosher salt
½ cup currants
3 eggs
¾ cup packed light brown sugar
¼ cup unsalted butter, melted and cooled
⅓ cup buttermilk
1 tsp. pure vanilla extract
1 lb. carrots, peeled and coarsely grated (about 3 cups)
½ cup slivered or sliced almonds
* I found that a ½ cup of sliced almonds was way too many. ⅓ cup will most likely be enough.
I use the following conversions in my cooking:
1 cup all-purpose flour = 125 g
1 tsp. baking powder = 4 g
1 tsp. baking soda = 8 g
1 tsp. ground ginger = 2 g
1 tsp. ground cinnamon = 3 g
1 tsp. ground nutmeg = 2 g
1 tsp. kosher salt = 6 g
¾ cup light brown sugar = 150 g
¼ cup butter = 57 g
⅓ cup buttermilk = 80 ml
1 tsp. pure vanilla extract = 5 ml
1 lb carrots = 500 g
½ cup sliced almonds = 46 g
TIP: If you do not have access to currants, you can substitute them for yellow raisins without altering the flavour of the loaf too much.

Above is what the dry ingredients looked like after whisking them together and then stirring in the currants.
TIP: Coating fruits/nuts in a bit of flour, or mixing them into the dry ingredients, before adding them to the wet ingredients allows for an even distribution through the loaf instead of them all sinking to the bottom!

Above is what the progression of the wet ingredients looked like as they were combined.
Picture 1: whisked the eggs and light brown sugar until well combined
Picture 2: whisked in the melted butter until well combined
Picture 3: whisked the buttermilk and vanilla extract until well combined
Picture 4: Stirred in the carrots
The batter will get progressively lighter as more of the wet ingredients are added.
TIP: I would highly recommend using an electric hand mixer to whisk the ingredients together and not just a regular whisk. Although it is possible, it will take a lot more time and energy to achieve the same result!

Above is what the batter looked like when the wet and dry ingredients folded until just combined. This will be a very liquidy batter, so don’t be too alarmed.
Do not overmix the batter! The more you mix the batter, the more the gluten in the flour will develop. If too much gluten develops, you will end up with a dense, rubbery loaf.
TIP: When folding batter, you’re essentially creating a “J” motion with your spatula around the bowl. To fold, first, scrape ~⅕ of the side of the bowl with a flexible spatula. Then, move it towards the middle of the bowl like you’re “folding” the batter. Finally, rotate the mixing bowl by the amount you scraped so that you’re always folding the batter towards you. Repeat the process until everything is combined!

Above is what the batter looked like topped with almonds before and after cooking.
I found the 55 minute cook time recommended was not enough time. The batter was very wet and although it was edible after 55 minutes, there were areas that were way too undercooked for comfort. On the other hand, it was the perfect amount of time to get the almonds to a nice golden brown.
So, how to keep the loaf cooking while not burning the almonds? First, bake as directed in Heroes’ Feast: 55 minutes on 350°C, turning halfway through. Next, tent a piece of aluminum foil shiny-side in over the pan. This will stop the top of the loaf from cooking while retaining the heat needed to cook the inside. Then, leave the loaf in the oven for another 15 minutes or until a toothpick comes out clean.
TIP: To allow for easy release, cut a piece of parchment paper to fit lengthwise in the pan. This will allow you to lift the loaf out of the pan. See the pics above and below for how it looks.

Above is what the loaf looked like after removing it from the pan.
Cool the loaf as directed in Heroes’ Feast: cool the loaf pan on a wire rack for 15 minutes then remove it from the pan and allow it to cool to room temperature.

Although the cooking time in the book may have been a little bit off, only a small tweak was needed to fix it. Overall, I would give this recipe a 5/5! Everyone in my house loved this loaf and one of my housemates even said it was the best carrot cake they’d ever eaten - which I can’t say I disagree with.
This was the longest recipe so far, but like the potato leek soup, don’t be discouraged! Most of the time is hands-off baking and the taste of this cake alone is worth the time.
For best freshness results, wrap in clingfilm and store on the counter or in the fridge. Lasts up to 7 days when stored in the fridge.
BONUS: Cream cheese frosting recipe
Two of my housemates said the cake on its own was a 4.5/5 and that a cream cheese frosting would make a 5/5. So, below is a delicious yet easy-to-make cream cheese frosting to go with it!
It’s a great base and the page provides details on how to alter it so it can be used with other baked goods! Find out more here: https://sallysbakingaddiction.com/favorite-cream-cheese-frosting/
Ingredients for frosting:
8 ounces full-fat block cream cheese, softened to room temperature
½ cup unsalted butter, softened to room temperature
3 cups confectioners’ sugar, plus an extra ¼ cup if needed
1 teaspoon pure vanilla extract
⅛ tsp. salt
The following conversions are provided for the ingredients:
8 ounces full-fat block cream cheese = 224 g
½ unsalted butter = 115 g
3 cups confectioners’ sugar = 360 g
1 tsp. pure vanilla extract = 5 ml
⅛ tsp. kosher salt = 1 g
NOTE: Be sure you are using a full-fat block of cream cheese! Not low-fat or from a tub. As the recipe points out:
The #1 reason bakers end up with runny frosting is because they’re accidentally using cream cheese spread instead of a block.
If using from a tub, there’s a good chance your frosting will be thin and runny!

Above is what the frosting looked like after creaming together the cream cheese and butter and then beating in the confectioners’ sugar and vanilla.
If you want your frosting a little thicker, beat in the extra ¼ cup of confectioners’ sugar.

For best freshness results, store in a tupperware in the fridge. Lasts up to 5 days in the fridge.
Underdark Lotus with Fire Lichen Spread

Sometimes called “fungus two ways,” this zesty duergar essential is sure to rouse the taste buds of even the most spiced-crazed tiefling. - Heroes’ Feast, p. 93
I’ve always found hummus to be a very interesting snack food. With countless possible flavour combinations, you would be hard-pressed to grow tired of this nutritious spread!
Eccentric in both name and origin, the Underdark Lotus with Fire Lichen Spread is sure to satisfy your hunger and delight your taste buds. Between the sweet taste of the carrots and the savoury taste of the cumin, it really is the perfect snack food for spring, summer, and fall!
Fun fact: this hummus has become so popular in our house during hang-out sessions that it’s one of the few recipes I’ve got memorized!
See below for my notes on the results and for some helpful tips and tricks when making this yourself! Get Heroes’ Feast here: https://dnd.wizards.com/heroes-feast
Note: The terrible lighting in this post is brought to you by me moving back into my student house from my parents’ home.
Prep Time: ~15 mins Cook Time: ~35 mins (25 roasting + 10 misc.) Overall: ~45 mins

For the ingredients:
1 (15-ounce) can chickpeas, drained and rinsed
1 lb. carrots (about 4 large), peeled and chopped
¾ tsp. cumin seeds or sweet paprika
1 tsp. cayenne
3 tbsp. olive oil, plus more for drizzling
⅔ cup cold water, plus more as needed
¼ cup fresh lemon juice
¼ cup tahini*
Kosher salt
Freshly ground black pepper
Radishes, sliced cucumbers, romaine lettuce leaves for dipping*
* I substituted the tahini for the same amount of 2% greek yoghurt.
** Use any of your favourite veggies/dippables! I used radishes, sliced cucumbers, any kind of sweet pepper, and flatbread (naan).
I use the following conversions in my cooking:
1 lb. carrots = 500 g
1 tsp. cumin seeds = 2 g
1 tsp. sweet paprika = 2 g
1 tsp. cayenne pepper = 1.8 g
3 tbsp. olive oil = 44 ml
⅔ cup water = 160 ml
¼ cup fresh lemon juice = 1 large lemon, juiced
¼ tahini/greek yoghurt = 60 ml
NOTE: I would caution against using bottled lemon juice instead of fresh lemon juice in this recipe. I found using bottled lemon juice gave the hummus an unpleasant bitterness compared to a freshly juiced lemon.
NOTE: I would caution the amount of cayenne pepper called for in this recipe. Even for the spice junkies in my house, 1 tsp. was A LOT of cayenne pepper. I would recommend starting with a little bit less than ¼ tsp. (~0.4 g) and increase it from there each time you make them.

Above is what the veggies looked like before and after roasting. Make sure to toss the carrots, chickpeas, 2 tbsp. olive oil, and spices together first. Then, sprinkle the salt and a generous amount of pepper overtop. I chopped the carrots into slices about a ½ inch (~1 cm) thick.
Although they aren’t a staple in many kitchens, I would highly recommend using cumin seeds for the hummus instead of the paprika - even if you need to buy them. They add an incredible taste to the hummus that makes them worth the extra price.
NOTE: Although Heroes’ Feast states to process the veggies right after coming out of the oven, I’ve had no problem with the flavour when storing them in the fridge and processing them cold.

Above is what the roasted veggies, lemon juice, water, greek yoghurt, and olive oil looked like in the food processor.
TIP: I highly recommend investing in a food processor with built-in side scrapers like the one above. Not having to stop the food processor to scrape down the sides of the bowl is a great time-saver!
TIP: Roll the lemon like a rolling pin before cutting it to maximize the amount of juice it contains.

Above is what the hummus looked like after being processed. Although Heroes’ Feast says to process it until smooth, I found the coarser consistency created a more rustic feel that was a better fit for a D&D setting.
To get it to this texture, I processed it on the lowest setting, continuously scraping down the sides, for 20 seconds. I then added ~1 tsp. more water and repeated the same process for another 20 secs.

Overall, I would give this recipe a 5/5. Everyone in my house thoroughly enjoyed it and it has become a staple during Monday movie nights!
For best freshness results, store any extra hummus in a sealed tupperware container in the fridge. It will keep for about a week or until the greek yoghurt is set to expire.
Potato Leek Soup (w/ Smoked Turkey)
Served year round, this dense and nutritious vegetable blend is perfect for warming the limbs and souls of dwarves subjugated to the unrelenting cold of damp subterranean life. - Heroes’ Feast, p.97
There’s something very comforting about a rich, creamy soup on an overcast day. Whether rain or snow, its warmth gives you a sense of homely comfort and raises your spirits.
I’d never tried potato and leek soup before attempting this recipe and was skeptical at first; how good could some leeks and potatoes be? However, I was blown away by taste! Delicious and filling, this Potato Leek Soup is sure to satisfy your hunger while giving you those reading-a-good-book-on-a-rainy-day vibes. Make sure to dip a thick slice of sourdough bread from your nearest bakery in it for an even more knock-your-socks-off taste!
As an added bonus, this soup is easily made vegetarian! See the results sections to find out how.
See below for my notes on the results and for some helpful tips and tricks when making this yourself! Get Heroes’ Feast here: https://dnd.wizards.com/heroes-feast
Prep Time: ~30 mins Cook Time: ~1h 30 mins Overall: ~2 hrs

For the ingredients:
2 slices thick-cut bacon*
3 leeks, white and green parts, thinly sliced
3 celery stalks, chopped
2 tsp. fresh thyme leaves
2 lb. russet potatoes, peeled and cut into 1-inch pieces
4 cups low-sodium chicken broth
1 cup heavy cream**
Kosher salt
Freshly ground black pepper
* I substituted the bacon for smoked turkey.
** I substituted the 35% heavy cream for 18% table cream.
I use the following conversions in my cooking:
1 lb. russet potatoes = 500 g
4 cups chicken broth = 900 ml chicken broth + 50 ml water
1 cup heavy cream = 240 ml
NOTE: Be careful if using dried thyme instead of fresh thyme since dried spices have a much more concentrated flavour. Use one-third of the amount of fresh thyme called for in the recipe if substituting for dried.
TIP: 4 cups of chicken broth is ~950 ml (~33 fl oz.) and a carton of chicken broth contains ~900 ml (~30 fl oz.). Don’t bother buying another carton of chicken broth for the extra 50 ml (~2 fl oz.)! Use up one carton and make up the difference with water.

I didn’t use bacon for this recipe, but still wanted to infuse the broth with the flavour. Luckily, smoked turkey has an extremely similar taste and texture to ham! Just be sure to use extra smoked turkey because it doesn’t release as much fat - which is needed for the flavour.
Above is what the smoked turkey looked like after cooking for 15 minutes (flipping halfway through). It won’t get as crispy as the bacon, but it will still have all of those awesome flavours.
NOTE: Like turkey bacon, smoked turkey doesn’t have enough fat to fry itself. Make sure to add a little bit of neutral-tasting oil to the saucepan, like vegetable, canola, safflower or grapeseed oil, to fry it.

The fried smoked turkey will not crumble like the bacon would. To sprinkle it onto the soup, I diced it into small cubes.

Above is what the vegetables looked like before and after they softened. This will take ~5 mins and they will take up around half of their original volume in the saucepan.

Above is what the soup looked like after cooking. Letting the potatoes simmer on low heat to soften will take forever. Instead, bring the soup to a boil on high heat then turn it back down to medium to simmer.
It will take about 10 minutes to bring the soup to a boil and it will need to cook on medium for 30 minutes in order for the potatoes to soften enough to blend.

Above is what the soup looked like after blending. I used a magic bullet since I don’t have a proper blender. It took 7 batches filled slightly less than halfway to get through all of it.
Be careful when using a magic bullet to blend the soup - it will be extremely hot! Use a kitchen towel to hold the magic bullet when opening it to avoid burning yourself.
Also, you will need to rinse off the blade attachment each time you blend a batch of soup. The extra soup will prevent a proper seal from forming.

Above is what the soup looked like after I added the cream. I found that 5 minutes was plenty of time for it to thicken.

Overall, I would give this recipe a 5/5 - my grandmother even asked me to teach her how to make it! It has easily put itself on the rotation of dinner meals.
Also, don’t get discouraged by the time it takes to make! Most of the cooking time is hands-off and the prep time can easily be halved if you have someone helping you.
VEGETARIAN: Forego the bacon and use vegetable broth instead of chicken broth. The taste will be more vegetable-heavy but it doesn’t take away from the tastiness of the soup.
Otik’s Skillet-Fried Spiced Potatoes

[...] the recipe featured below is widely thought to be the closest that one can come to the feeling of sitting atop the famed vallenwood tree tavern with one of his homebrewed dark ales in hand. - Heroes’ Feast, p. 20
Hashbrowns are one of my all-time favourite breakfast side dishes but usually have a large time component or an uninteresting flavour. After trying numerous recipes, I was beginning to wonder if I would ever find one that I would enjoy. Then came Otik's Skillet-Fried Spiced Potatoes! The first time making these for my house, we were all blown away by how great they were!
Seasoned to perfection with a kick of spice, these skillet fried potatoes have become a staple at our Saturday morning breakfast table. They’re amazing whether eaten the day-of or heated up later. Try the ultimate breakfast trio and eat them with the Yawning Portal Buttermilk Biscuits (p. 31) and the Feywild Eggs (p. 58).
Want to eat them but aren’t a morning person? No problem! These fried potatoes also make an amazing base for a fun lunch or dinner meal. Just add some sausage and chopped green pepper and voilà!
See below for my notes on the results and for some helpful tips and tricks when making this yourself! Get Heroes’ Feast here: https://dnd.wizards.com/heroes-feast
Prep Time: ~15 mins Cook Time: ~40 mins Overall: ~55 mins

For the ingredients:
2 tablespoons neutral-tasting oil
1 large yellow onion
1 tsp. kosher salt ( ½ tsp. for onions, ½ for spicing)
1.5 lbs. Yukon gold potatoes, scrubbed or peeled, cut into ¾-inch pieces
1 tbsp. salted butter
Freshly ground black pepper to taste
1 tsp. sweet paprika
1 tsp. cayenne*
½ tsp. garlic powder
2 tbsp. minced fresh chives
*See ingredients notes
I use the following conversions in my cooking:
1 lb. potatoes = 500 g
½ tsp. garlic powder = 1.5 g
1 tsp. cayenne pepper = 1.8 g
1 tsp. sweet paprika = 2 g
½ tsp. kosher salt = 3 g
Although they may seem inconsequential, I would consider the chives a necessity with this recipe. The fried potatoes are amazing on their own but pairing them with the chives really makes them shine.
I have made these fried potatoes both with and without the onion due to differing tastes in my house. I would suggest using a little more garlic powder than what’s called for if leaving out the onion.
TIP: To save yourself time in the morning, cut up the onion and the potatoes the night before. Keep fresh by submerging the cubed potatoes in cold water and covering the onions in cling wrap and storing them in the fridge.
NOTE: I would 100% recommend using a non-stick skillet for this recipe if you have access to one. I tried making these in a stainless steel pan with the recommended amount of oil: the skins stuck to the bottom instantly and the pan was a nightmare to clean.
NOTE: I would caution the amount of cayenne pepper called for in this recipe. Even for the spice junkies in my house, 1 tsp. was A LOT of cayenne pepper. I would recommend starting with a little bit less than ¼ tsp. (~0.4 g) and increase it from there each time you make them.

Above is what my onions looked like after I fried them up. I did my best to achieve the “browning with brown edges”.
Don’t skip the salt on this step, it helps the onions brown!
NOTE: With a properly heated pan, I’ve found that 4 minutes on medium-high and 4 minutes on medium were too generous for time. Once you’ve gotten the oil shimmering, they’ll need only 3 minutes on each.

Above are the potatoes after they were softened in the microwave.
Heroes’ Feast mentions this, but do make sure to drain any water the potatoes have released. Skipping this will mess with the development of the skins and cooking time.
TIP: To save time, put the potatoes in the microwave when you start cooking the onion.

Above is the progression of what the potatoes looked like as they were cooking.
Pic 1: Potatoes when just put into the pan
Pic 2: First flip after 6 minutes
Pic 3: Second flip after 6 minutes
Pic 4: Third flip after 4 minutes
Not shown: I flipped them once more after 4 minutes right before stirring in the spices and onion
Altogether, the potatoes were fried for 20 minutes.
TIP: If you don’t only have unsalted butter to combine with the oil, add a small pinch of kosher salt to the pan.
NOTE: Remember to never overcrowd the pan when cooking! However, if you find that you have, it’s fixable. Simply make sure that you’re always moving the potatoes on the outside edges in when you flip them and cook the potatoes for as long as it takes for the biggest pieces to have softened.

Above is what the potatoes looked like after stirring in the spices and the onion.
TIP: To keep the onions from cooking more when you return them to the pan, mix in the spices first then take the pan off the heat for ~30-45 seconds before adding them in. They’ll still cook a little, but there’s less risk of them burning.

Overall, I would give this recipe a 5/5. Like the Yawning Portal Buttermilk Biscuits, they’ve quickly become a weekend brunch staple in our house!
Additionally, these go great with a homemade (or store-bought!) hollandaise sauce or when eaten as a side for the Feywild Eggs. The richness and flavours combine to create an amazing taste that’s sure to liven up your morning!
For best freshness results, store in a sealed container in the fridge. Keeps for up to 4 days.
NOTE: Consensus in our house: Those who enjoy onion give them a 5/5 with onion and a 4/5 without. For those who don’t, they’re a 5/5 without onion. So, overall, you really can’t lose! Just remember to adjust the spices (especially the cayenne pepper!!) if you’re making a smaller side batch for someone who doesn’t like onions. Learned that the hard way...
Yawning Portal Buttermilk Biscuits

While the inn’s undisputed main attraction is the cavernous portal that descends straight into deadly Undermountain dungeon, these famed biscuits are a close second. - Heroes’ Feast, p. 31
I’ve always wanted to make biscuits, but was never motivated enough on a Sunday morning to take the time to prep and clean my bread board to knead dough. So, it was a wonderful surprise when I saw this no-knead recipe for biscuits in Heroes’ Feast!
Crunchy on the outside and soft on the inside, these biscuits are so melt-in-your-mouth delicious that you’ll throw away any other recipe you have. Whether eaten warm, at room temperature, or a day or two later, they are an amazing on-the-go breakfast snack that pairs well with any jam.
To really spice up your morning, try them with a side of Otik’s Skillet-Fried Spiced Potatoes!
See below for my notes on the results and for some helpful tips and tricks when making these yourself! Get Heroes’ Feast here: https://dnd.wizards.com/heroes-feast
Prep Time: ~20 mins Cook Time: ~50 mins (30 bake, 20 cool) Total Time: ~1h 10min

For the ingredients:
12 tbsp. unsalted butter (2 tbsp. at room temp. 10 tbsp. chilled)
3 ½ cups all-purpose flour
1 ½ tsp. baking powder
½ tsp. baking soda
1.25 tsp. kosher salt
1 ½ tsp. sugar
1 2/3 cups buttermilk
I use the following conversion in my cooking:
1 cup all-purpose flour = 125 g
1 tbsp. butter = 14 g
1 tsp. sugar = 4 g
1 tsp. baking powder = 4 g
1 tsp. baking soda = 8 g
1 tsp. kosher salt = 6 g
TIP: If you don’t have unsalted butter, lower the salt content by ~1/3 tsp (2 g).

Above is what the dry ingredients looked like after I broke up the chilled cubed butter into pea-sized pieces.
TIP: Cut your butter into cubes and store it in the fridge until you add it to the dry ingredients. The colder the butter is (without freezing!), the better the pockets of buttery-goodness will turn out.

Above is what the dough looked like after adding the buttermilk. Be aware, it will be a very sticky dough.
Sometimes, you might find that there’s a little bit of flour at the bottom of the bowl that won’t mix in. This is okay! Just put in in the baking dish with the rest of the dough.

Heroes’ Feast mentions doing this, but I want to reinforce that it is very important to grease the spatula before scoring the biscuit dough. The dough is incredibly sticky and will be a nightmare to deal with if using an ungreased spatula.
I don’t have my 8 x 8 pan with me right now, but I do have a 7 x 11 x 2 glass dish. To account for both the dough being shallower and the baking dish being made of glass, I decreased the cooking time by 6 minutes.
While making these, I found that you don’t need to flour your hands and push the dough to the corners of the pan. If you have a strong enough silicone spatula, you can easily grease it and move the dough around that way. No need to get your hands dirty!
Don’t forget to rotate the baking dish halfway through cooking!

Above is what the biscuits looked like after they came out of the oven and were brushed with butter.
TIP: To remove the biscuits from the baking dish with as little hassle as possible, place a large cutting board over the baking pan and invert it onto the board. The biscuits will slide out easily and you can transfer them to the cooling rack from there.

Overall, I would give these biscuits a 5/5. They’ve quickly become a Sunday morning staple and I always have to stop my family from eating them before they cool-down!
If you’re planning on having them with jam, I’d recommend not adding any more butter. The butter content is so high that they don’t need any more of it.
For best freshness results, store them in a paper bag on your kitchen counter. They will keep for 2-3 days.

'King Of Rock' Frozen Pudding Pops - Frozen Dessert A frozen dessert fit for a king or your kids, this is a banana and peanut butter frozen pudding pop.
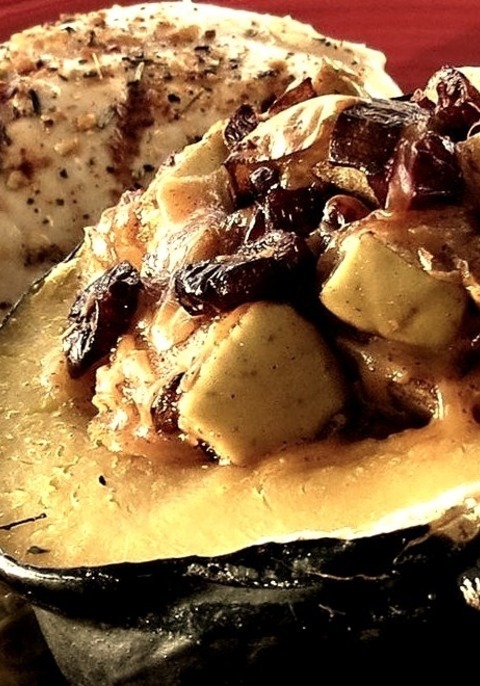
Apple-Stuffed Acorn Squash In this recipe for apple-stuffed acorn squash, Granny Smith apples and Cheddar cheese combine to make a delicious filling for the squash halves.

Cuisine - Lebanese - Kafta BBQ The yummiest preparation mixture for ground beef EVER! I have made this Lebanese meat for all of my friends and family and have HAD to leave the recipe with everyone! The mixture can be used for everything: meatballs, meatloaf, BBQ skewers, and hamburgers.

Gelato - European A basic gelato recipe that's the perfect base for favorite flavors from vanilla to chocolate to any fruit in between. Enjoy this creamy frozen treat.

Hot Cinnamon Peanut Brittle - Desserts - Peanut Dessert A fun twist on the original, this brittle tastes like a cross between hot cinnamon candies and traditional peanut brittle.

Shrimp - Honey-Garlic Shrimp Chef John's simple recipe for honey-garlic shrimp is a great option for a weeknight dinner for two because it has the ideal combination of sweet and savory flavors.

Gingersnap - Crispy Vegan Gingersnaps These spicy, crunchy vegan cookies go well with a hot beverage in the fall and winter. The eggs and dairy won't be missed.

Spicy Tequila Mango Chicken - Meat and Poultry Tenderized chicken is marinated in a garlicky hot sauce and simmered with sweet mangos in this uniquely flavored mango chicken recipe that delivers a kick with each bite.